Showing posts with label Vegetarian Recipes. Show all posts

Thursday, February 13, 2025

Whole Roasted Cauliflower

 https://www.wholesomeyum.com/whole-roasted-cauliflower-recipe/


Ingredients

1 head Cauliflower
1/3 cup Olive oil
3 cloves Garlic (crushed)
1/4 cup Grated Parmesan cheese (divided)
1 tsp Dried basil
1 tsp Dried parsley
1 tsp Dried thyme
1/2 tsp Sea salt (or more to taste)
1/4 tsp Black pepper


Whole Roasted Cauliflower

With a golden garlic parmesan topping, this roasted cauliflower head looks impressive, but it's easy to make with simple ingredients.

Did you know you can roast a cauliflower head without cutting it apart? I love roasted cauliflower florets, but they compare to my whole roasted cauliflower recipe when I want an impressive main or side dish. And while it makes a stunning addition to a special dinner (like Christmas or Thanksgiving — one of my go-to holiday sides), it’s so easy to enjoy any night of the week.

Preheat the oven to 400 degrees F (204 degrees C).

Rinse the cauliflower head and pat dry. Remove the outer leaves. Carefully cut off the bottom so that it and most of the woody stem are removed, being careful not to cut off so much that it falls apart. Be sure the head stays intact.

In a small bowl, make the garlic Parmesan sauce. Add olive oil, minced garlic, 2 tablespoons (28.3 grams), grated Parmesan (half the total), basil, parsley, thyme, sea salt, and black pepper.

Place the trimmed cauliflower head upside down (core side up) in a 6-quart (5.6 liters) Dutch oven. Drizzle half of the sauce over the cauliflower, tilting it to let it drip down the core and all around. Flip over and drizzle the remaining sauce over the top. Use a pastry brush to brush on any dripping down to the pan.

Cover the Dutch oven with a lid and bake for 35-45 minutes, until the cauliflower is tender and pierces easily with a skewer, knife, or fork.

Remove the lid. Sprinkle the top of the cauliflower with the remaining 2 tablespoons of grated Parmesan cheese. Place the cauliflower under the broiler and broil for about 5 minutes until the cheese is browned.

Thursday, January 30, 2025

Cold-fighting bok choy soup


Shonna's Bok Choy Soup

I made my own Bok Choy soup with Bok Choy, celery, green onions, radish, fresh ginger, konjac noodles, sesame chili oil,  tofu, veggie broth, and veggie soy sauce.

Sis Faith shared a soy-free tofu brand with me, so next time, I will use a vegan tofu. 

I split the pot in half with my mom, which gave her enough for at least 3 days, but she called and told me she indulged in eating most of it in one night!!!

I must admit it turned out delicious. Konjac is a plant-based noodle, and so there is no sugar.

This vegetarian bok choy soup is a simple yet delicious recipe that combines fresh vegetables, noodles, and aromatic seasonings. It’s unbelievably quick and full of nourishing ingredients, making it perfect for a cozy winter lunch or dinner.

  • Baby bok choy: Also known as pak choy, this fresh, crunchy veggie is perfect for soups! I recommend using Shanghai bok choy (green bok choy) or Dwarf bok choy (cream bok choy) for the best results. Check for either at your local Asian food market.
  • Shallot: Adds a mild, sweet onion flavor. Leeks or chives also work as alternatives.
  • Serrano pepper: For a more earthy kick. You can also use a jalapeño in place of the serrano pepper.
  • Garlic: Essential for building an aromatic broth. Use paste or freshly minced garlic. I don’t recommend their powdered forms for this soup.
  • Avocado oil: To sauté the aromatics. You can replace avocado with sesame oil for a more toasty, nutty flavor.
  • Shiitake mushrooms: Provide an earthy flavor and meaty, buttery texture. If you don’t have shiitakes, try portobello or cremini mushrooms.
  • Rice noodles: I also love to make this soup with udon or soba noodles. Again, any of these options are typically available at Asian food markets or large grocery stores.
  • Soy sauce: Imparts a punch of umami flavor. Tamari or coconut aminos are suitable substitutes if you’re trying to avoid gluten.
  • Maple syrup: Adds a hint of sweetness, balancing the savory ingredients. Agave or a pinch of brown sugar will also work.
  • Rice vinegar: Provides a touch of tanginess and acidity. If you don’t have rice vinegar, mirin or apple cider vinegar will work, though the flavor will be slightly different.
  • Water: For a more complex broth, use mushroom stock or bouillon.
  • Salt: Just a pinch to taste to balance the sweet, tangy, and spicy flavors.
  • Garnishes are optional, but I love adding chili garlic sauce, sesame seeds, and red pepper flakes for more flavor and heat.

  • https://greenheartlove.com/bok-choy-soup/

Saturday, January 25, 2025

Brazilian Black Bean Soup

 Add to My Favorites

© Dotdash Meredith. All rights reserved. Used with permission.

Brazil’s cuisine often features smoky, grilled meats, but this vegetarian bean soup recipe is entirely meat-free. Instead, blackened jalapeños, fire-roasted tomatoes, and smoked paprika provide the Brazilian flair. A little molasses adds a sweet-toasty note, and the kale, while not traditional, bumps up your daily veggie count.


Prep/Cook Time: 1½ Hours, Servings: 8
Ingredients
2 jalapeño peppers
2 tablespoons extra-virgin olive oil
3 cups chopped onion
1½ cups diced carrot
5 cloves garlic, minced
4 cups low-sodium vegetable broth
4 15-ounce cans low-sodium black beans, rinsed
1 28-ounce can of fire-roasted diced tomatoes
3 tablespoons molasses
2 tablespoons lime zest
5 tablespoons lime juice
1½ teaspoons ground cumin
1½ teaspoons smoked paprika
⅛ teaspoon cayenne pepper, or to taste
3 bay leaves
1 teaspoon salt
¾ teaspoon ground pepper
4 cups chopped kale
Chopped scallions & chopped fresh tomato for garnish

Directions

Heat a medium skillet over high heat. Split jalapeños in half lengthwise, remove ribs and seeds, and place skin-side down in the pan. Cover the pan with foil and cook until the skins are blackened 7 to 10 minutes. Let cool, then dice.

Meanwhile, heat oil in a large pot over medium-high heat. Add onion and carrot and cook, stirring often, until starting to brown 6 to 8 minutes. Reduce heat to medium and continue cooking, stirring often, until soft, 3 to 5 minutes more. Add garlic and the diced jalapeños and cook, stirring, for 1 minute more.

Stir in broth, scraping up any browned bits. Cover and bring to a boil over high heat. Add beans, tomatoes, molasses, lime zest, juice, cumin, paprika, cayenne, bay leaves, salt, and pepper. Cover and return to a boil. Reduce heat to maintain a gentle simmer and cook, un­covered, for 30 minutes.

Remove bay leaves. Puree 4 cups of the soup in a blender (use caution when pureeing hot liquids), then stir it back into the pot. Stir in kale, cover, and simmer until tender, about 5 minutes. Serve garnished with scallions and tomatoes, if desired.


Thursday, January 23, 2025

Plant Based Vegan BigMAC

 2025 has begun with a few of my family and friends sharing great recipes and meal prep ideas.  Shonna McDaniel's is into her vegan mode and crafting excellent, delicious plant-based dishes.  Here is a vegan & plant-based meal to try.  

This delicious vegan Big Mac McDonalds replica can be made in 10 minutes at home using easy-to-find ingredients! Anyone in your household will find this burger tasty with my vegan Big Mac sauce included! 

If you have non-vegans in your household, it’s quicker to make this vegan Big Mac at home than it is driving and waiting in line to order a non-vegan McDonald’s Big Mac (not to mention healthier, fewer calories,  cheaper, and better for the environment)

Ingredients for the burger patties:

  • 1 can of black beans, drained and rinsed
  • 1/2 cup of cooked brown rice
  • 1/4 cup of bread crumbs
  • 1/4 cup of chopped onions
  • 1/4 cup of chopped green pepper
  • 1 tablespoon of soy sauce
  • 1/2 teaspoon of garlic powder
  • Salt and pepper to taste

To make the burger patties, combine all the ingredients in a food processor and blend until the mixture is smooth. Divide the mixture into four equal portions and form each into a patty shape. Place on a baking sheet lined with parchment paper and bake in the oven for 20-25 minutes. 

For the special sauce

  • 1/4 cup of vegan mayo
  • 2 tablespoons of vegan Thousand Island dressing
  • 1 tablespoon of yellow mustard
  • 1 tablespoon of finely chopped onions
  • 1 tablespoon of sweet pickle relish
@ Healthy Vegan Eating

Heat a grill pan over medium-high heat. Cook the burgers on each minute for 3-4 mins until heated through (or according to the package instructions if different).

While the burgers are cooking, chop your onions, lettuce and pickles.

To make the middle bun of the Big Mac, you can cut the top off the bun, so your bun has 3 parts.

Lightly toast all three bun parts by tossing them on the heat grill pan, face down, for 1 min, covered.

To assemble the burger, spread ½ to 1 tbsp Big Mac sauce over the bottom piece of each bun.

Then, add some minced onion, iceberg lettuce, one vegan cheese slice, one burger patty, and three pickle medallions (like at the restaurant).

Put the middle portion of the bun on next and spread with another 1 tbsp of Big Mac sauce, topped with onion, some lettuce,1 vegan cheese slice, 2nd burger patty, pickle medallions, and burger bun with more Big Mac sauce.

To melt the cheese, microwave each burger for 30 seconds or heat it in a pan with a cover.

Serve with a side of fries.

Nutrition Information

Serving size: 1 Burger Calories: 465 Fat: 24g Saturated fat: 6.4g Trans fat: 0mg Carbohydrates: 35.8g Sugar: 5.9g Sodium: 1432mg Fiber: 4.3g Protein: 27.2g Cholesterol: 0mg

Morning Star Farms- 

Hurry the Food Up

Friday, January 3, 2025

The Cultural Significance of Black-Eyed Peas in Black Culture During New Year's Celebrations

Dry Black-Eyed Peas Soaking 

Herbert Raney Jr's 2025 NY Day Black Eyed Peas

Shonna McDaniel's New Year's Day 2025 Dinner
Black Eyed Peas, Black Rice, Yams, Greens, Cornbread

My New Year's 2025 MENU started with sharing my dishes."

Black Eyed Peas and Beef Sausage

As New Year's Eve approaches, various traditions and customs dominate celebrations worldwide. In Black culture, particularly within African American communities, one such tradition stands out for its deep historical roots and symbolic meaning: the serving and eating of black-eyed peas. This custom is not just about a meal but is a profound expression of hope, resilience, and the aspiration for prosperity in the coming year.

The tradition of eating black-eyed peas for luck and prosperity dates back to the era of the Civil War. During tumultuous times, black-eyed peas were considered more of a humble food for livestock. However, they became a symbol of survival and resilience for enslaved Africans and, later, freed African Americans. The peas were one of the few nourishing foods available during these challenging periods, and thus, they became a symbol of good fortune.

2025 Kwanzaa Table

Seafood and Chicken Gumbo

Sweet Potatoe Pie with Pecan Topping

Tossed Green Salad
Akara (Accara): Nigerian and West African Black-Eyed Pea Fritters

The black-eyed pea is more than just a legume with its distinctive black spot. It's imbued with layers of symbolism. The peas represent coins or wealth; consuming them is believed to bring financial prosperity. Often, they are cooked with greens, which symbolize money, and served with cornbread, representing gold. This meal becomes a symbolic wish for a prosperous and lucky new year.

Over the years, the tradition of eating black-eyed peas has transcended beyond its origins. Many African American families consider it a culinary custom on New Year's Day. This practice is a nod to the past and a hopeful look towards the future. It's a tradition passed down through generations, keeping the history alive and connecting the present to the ancestral roots.

Today, black-eyed peas are featured in various New Year's dishes, creatively adapted to modern culinary practices while still holding their cultural significance. From Hoppin' John to black-eyed pea salads and dips, these recipes have become a staple at New Year's celebrations in many Black households.

Repost: Dabney & Co. - Cocktail Bar and Lounge, 344 North Rose Street, Kalamazoo, Michigan 49007

At Dabney & Co., this tradition is celebrated with a modern twist in the form of Black-Eyed Pea Hummus, part of the New Year's Eve celebration "All Gold Everything." This dish nods to the cultural heritage and presents a contemporary and flavorful take on the classic legume. As guests enjoy this unique hummus, they partake in a custom steeped in history and meaning, offering a sense of continuity, hope, and expectation for good fortune and prosperity in the coming year. At Dabney & Co., it's more than just a celebration; it's an experience that honors the legacy of strength and optimism that continues to thrive in Black culture.

Nigerian Akara Recipe
Akara (Accara) are tasty, deep-fried, Nigerian black-eyed pea fritters that are also quite popular in West Africa.

Prep Time 5hours hrs
Cook Time 30minutes mins
Total Time 5hours hrs 30minutes mins

Course: Breakfast, Brunch, Dinner, Lunch, Main Course Cuisine: Indian, Nigerian, West African 
Ingredients
1.5 cups black-eyed peas
1/2 red onion
2 scotch bonnet/ habanero peppers (optional)
3 tsp vegetable bouillon
Salt to taste
Oil for deep frying

Instructions
First, skin the beans. Soak them in water for 3 minutes. After about 3 minutes, the skins should start wrinkling a bit. Place the beans in a food processor with just enough water to cover them. Pulse the food processor about 5-6 times to agitate the beans. This process breaks the beans up and separates the skins. Be careful. Some water might splash out of the processor while pulsing the beans.

Pour the skinned beans into a bowl. Rinse several times to separate the beans from the skins, draining the skins with the water with each rinse. The skins should come off quickly because the skins are lighter and should float to the top.

Once the beans are clean, soak them in water for at least 4 hours or overnight.
After the beans have soaked, drain the water they have been soaking in and rinse them again.
Grind the scotch bonnet peppers to a rough paste using a mortar, pestle, or food processor, then set them aside.

Blend the beans and the onions with 1/2 a cup of water until completely smooth. The texture should be similar to that of a thick muffin batter.

Heat up oil for deep frying in a pan up to 375°F while preparing the batter.
Add the salt, bullion, and scotch bonnet peppers to the bean batter, mixing continuously for five minutes to incorporate air into the batter.

With a large spoon, drop the batter a spoonful at a time into the hot oil to fry. Fry for 3-5 minutes on each side until it is golden brown on both sides. Take out the frying oil and place it into a colander or on paper towels to drain.

Serve hot!

Wednesday, November 8, 2023

Arugula & Pear Salad with a Balsamic & Sherry Vinaigrette

 Arugula and pear Salad with a Balsamic and Sherry Vinaigrette

Last month, while at the Nugget Market in Sacramento, California, I picked up some recipe cards that caught my attention. They looked delicious, and I decided to try them all to discover new foods and salads as I continue my journey of managing diabetes through a healthy diet. Since 2022, I have managed to lose 40 pounds in a year, and my A1C is at a normal level of 5.6.  It has not been without sacrifice I am not a vegan, I still eat protein and am mindful of not being anemic.


This simple salad of peppery arugula, sweet pears, fresh goat cheese, and candied pecans gets even better with a flavorful homemade vinaigrette.

Ingredients
Vinaigrette:
1 small shallot, minced
½ teaspoon minced garlic
2 tablespoons Dijon mustard
3 tablespoons balsamic vinegar
1 tablespoon sherry vinegar
½ tablespoon honey (omit and use a substitute)
¼ teaspoon salt
¾ cup extra virgin olive oil

Salad:
1 pear
5 ounces of baby arugula
1 cup candied pecans
Vinaigrette, to taste
4 ounces chèvre
Preparation
To make the vinaigrette, combine all the ingredients except the olive oil in a work bowl and whisk. Whisk in olive oil to emulsify.

For the salad, cut a pear in half, remove the core, and slice it into thin wedges. Combine pear wedges, arugula, and pecans in a work bowl. Toss with vinaigrette to taste and arrange on serving dishes. Top with crumbled chèvre.

Extra dressing can be stored in the refrigerator for up to 7 days.


Monday, November 6, 2023

Vegan Cauliflower Roast

Thanksgiving Recipes Will Appeal To Everyone At The Table

Looking for a plant-based entree everyone will love? This flavor-packed cauliflower roast might steal the show with its savory blend of seasonings and the sweet, spicy, and umami balance of Fly by Jin Zhong Sauce. Nugget Market is my favorite.


INGREDIENTS

1 head cauliflower

1 tablespoon sesame oil

4 tablespoons vegetable oil

2 cloves garlic, chopped

2 tablespoons sesame seeds

1/2 teaspoon turmeric

1 teaspoon salt

1/2 cup Fly by Jing Zhong Sauce

PREPARATION

Preheat oven to 350

Remove the outer leaves from the cauliflower, leaving the head intact. Combine sesame oil, vegetable oil, garlic, sesame seeds, turmeric, fennel seeds, and salt to form a paste. Rub the paste evenly over the surface of the cauliflower head, pressing into all the nooks and crannies.

Place the cauliflower on a lined baking sheet and roast for 40 minutes. Baste liberally with Zhong Sauce and return to the oven to glaze for about 10 minutes, until just tender,

To serve, slice cauliflower roast into slabs or cut into florets.

Balsamic-Glazed Roasted Cauliflower


A whole roasted cauliflower makes for a fantastic vegan main dish. This one is roasted around extra veggies and has a slightly sweet balsamic glaze. It's easy to throw together and will leave you feeling full, not heavy. Win!

Vegan Sweet Potato Pie

@Kat Wirsing

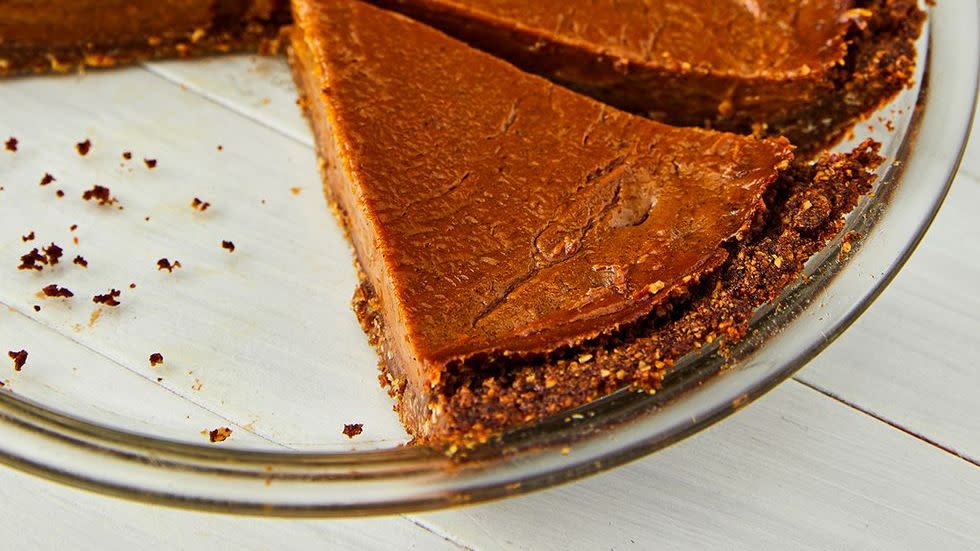
This sweet potato pie is extremely good, thanks to an oat pecan crust and a creamy, spiced filling. Look for vegan marshmallows to top it, or keep it simple with your own vegan whipped topping using coconut cream.

Ingredients

FOR THE CRUST

Cooking spray

1 1/2 c. pecans

1/2 c. old-fashioned oats

1/2 c. dark brown sugar

1/2 tsp. ground cinnamon

1/4 tsp. kosher salt

1/2 c. melted coconut oil

FOR THE FILLING

1 (15-oz.) can sweet potato purée

1 c. almond milk

3/4 c. dark brown sugar (substitute diabetics Pyure Organic Brown Sweetener ) 

2 tbsp. cornstarch

1 tsp. pure vanilla extract

1 tsp. ground cinnamon

1/2 tsp. kosher salt

1/4 tsp. nutmeg

1/4 tsp. ground ginger

FOR THE TOPPING

1 (13.5-oz.) full-fat coconut cream, refrigerated (Taste of Thai works best)

3 tbsp. powdered sugar (omit if you are diabetic)

Pinch kosher salt

Pyure Organic Brown Sweetener | Brown Sugar Substitute | Zero Carb, Zero Sugar, Zero Calorie | Measures and Bakes Like Brown Sugar | Plant-Based for Keto...

Friday, October 13, 2023

Banana Flax Pancakes

I woke up this morning craving pancakes; since I'm on this diabetic diet, I'm trying something new for breakfast. I have a couple of bags of flaxseed and flaxseed flour. I need the fiber, so I found this recipe from Kristen McCaffrey I'm trying this morning. 

 Meet Kristen McCaffrey August 21, 2023

Hi, I'm the cookbook author, recipe developer, and food enthusiast behind Slender Kitchen. I am obsessed with making healthy, easy-to-prepare, and absolutely delicious food. Meal planning is my secret weapon, and I hope to make mealtime more manageable for you with our tried and tested recipes and foolproof meal plans. These tasty Banana Flax Pancakes are nutritious, filling, and a great way to make healthier pancakes that still taste great.

▢ 1 ripe banana, mashed

▢ 2 eggs

▢ 1/4 tsp vanilla

▢ 1/16 tsp cinnamon (or nutmeg)

▢ 2 tbsp flaxseed meal

ADD TO MEAL PLAN…What is this Healthy, Low Carb, and vegetarian

Instructions

1. Mash the banana in a bowl.

2. Whisk in the eggs, vanilla, and cinnamon/nutmeg.

3. Stir in the flaxseed meal.

4. Heat a nonstick skillet over medium-high heat. Pour in batter, and once it begins to bubble and firm up on the edges, flip and cook on the other side for around 1 minute.


Monday, April 17, 2023

How to Cook Artichokes | Boiling Artichokes

My granddaughter and I are having artichokes for Sunday Dinner. This is her first time learning how to prepare and eat them. We used to do this all the time in the 80s when her uncles and mother were kids.


Steamed artichokes with butter are an occasional indulgence in our home and are fun to serve when guests come over. I will share How to Cook and Eat an Artichoke in today's cooking video. Enjoy!

PREPARATION INGREDIENTS
Artichokes
Lemon

Step 1
Select a large kettle or pot to hold all the artichokes you cook. Half fill it with water and set it over high heat to boil. Meanwhile, trim the artichokes.

Step 2
Rinse the artichokes, and slice the stem off flush with the base so the artichokes will stand level. Rub the cut areas with lemon. Slice off the top inch of each artichoke and rub the cut area with lemon. Using kitchen shears, snip off the top half inch of each leaf. Place the artichokes' base side down in the boiling water, lower the heat to simmer, and weigh the tops of the artichokes with a dish or pot lid that fits into the pot to keep the artichokes submerged.

Step 3
Simmer the artichokes until the base can easily be pierced with a knife point, 20 to 40 minutes. Then, remove the artichokes from the water and turn them upside-down in a colander to drain.

If you plan to serve artichokes cold, with a vinaigrette or mayonnaise sauce, they should be removed from the refrigerator at least an hour beforehand so they are not ice hard and flavorless. For generous serving, they should be trimmed before cooking, not only of the stem so they stand upright on the plate, but the prickly tips of the leaves should also be snipped off. And by using a spoon to scoop out the fuzzy "choke" in the center of the vegetable that protects its juicy, fleshy bottom, you not only create a convenient receptacle for the sauce or stuffing, but you also eliminate the need for performing this messy bit of surgery at the table. Basic Boiled Artichokes

Dipping Sauce:
Mainly you can just use melted butter or ranch dressing.
Today I'm trying this recipe that calls for

1/4 cup Mayonnaise
1/2 tsp crushed garlic
1 1/2 Lemon juice
1 1/2 Basil
1 tsp Worcestershire Sauce. 

I boiled my artichoke with garlic, vinegar, and pure olive oil water. Drained and squeezed fresh lemon on the leaves as it sat to rest. 


She loves  devil egg and pickles 

Tuesday, January 31, 2023

Crispy Baked Tofu

 
@ KARIN SCHWAB Photo Credit

Let’s talk about tofu! Even as a vegetarian, I don’t eat a ton of it. When I do, however, I want it crispy, and crispy tofu is an elusive beast. I’ve shared this method here and here, but I’ve gotten such fantastic feedback that I wanted to highlight it.

Even tofu skeptics love this tofu. Try it, and you will see it!

INGREDIENTS
1 block (12 to 15 ounces) of organic extra-firm tofu
1 tablespoon extra-virgin olive oil
1 tablespoon tamari* or soy sauce
1 tablespoon cornstarch or arrowroot starch
Tips for Irresistibly Crispy Tofu

1) Choose the right kind of tofu.

Extra-firm tofu is the only way to go, and I’ve found that the Trader Joe’s brand is the most firm of them all (plus, it’s only two dollars). It’s also organic, essential when buying tofu because soy is conventionally treated with fertilizers, herbicides, and insecticides. Look for tofu in the refrigerated section by the produce.

2) Squeeze out as much moisture as possible.

Water-logged tofu always gets somewhat crispy. The key here is to slice the tofu into pieces before pressing it. Have you ever tried pressing a whole block or even two halves? They just sit in soggy puddles. Instead, slice them into smaller pieces to maximize the surface area. Press those, and you’ll extract more moisture—faster, too.

3) Toss your tofu in oil, soy sauce, and starch.

Now, you just need to toss your tofu in a bit of oil (just 1 tablespoon for the whole batch), tamari or soy sauce (for some flavor), and cornstarch or arrowroot starch. The starch makes the edges extra crispy and irresistible (I got this idea from The Kitchen).

Cornstarch vs. arrowroot: You might be wondering which starch is better. Cornstarch is a more processed ingredient, but it yields the crispiest results. Arrowroot is less processed and works well, but the outer covering can become slippery and strange if you add tofu to a dish containing a lot of moisture (like curry).

4) Bake it.

Spread your prepared tofu in an even layer across a sheet pan. Don’t worry if your tofu fell apart as you tossed it. Bake until golden brown, about 25 to 30 minutes. Boom! Perfect tofu.

Why Bake Your Tofu?
Some swear by cooking their tofu in a skillet, but it never turns out well in my cast iron skillets. It sticks, and the crispy bits end up sticking to the pan, a tofu tragedy. Plus, it requires more oil, and you don’t need much oil to get crispy tofu.
When you bake your tofu, you give it time to develop crispy edges and warm, pillowy insides. It’s simply the best.

@ KARIN SCHWAB Photo Credit

@ KARIN SCHWAB Photo Credit

Uses for Crispy Baked Tofu
If you want to infuse your tofu with more flavor, I recommend adding sauce after it’s baked rather than marinating it. Why? Water-logged tofu isn’t very good at absorbing flavor (something I always suspected, which was confirmed by Deborah Madison via Serious Eats).

So, bake your tofu in the oven to crispy perfection, then cook it in sauce, or drizzle sauce on top. This tofu is perfect for tossing into any recipe with Asian flavors or any recipe that could benefit from some hearty vegetarian protein. For example, it would be great in my Thai red curry or green curry.

You could replace the eggs in my kale, coconut fried rice, and Thai pineapple fried rice with this tofu. It is fantastic, with peanut sauce drizzled on top in any form. (Fun fact: my crispy tofu and peanut sauce collide in my cookbook!)

INSTRUCTION

Preheat the oven to 400 degrees Fahrenheit and line a large, rimmed baking sheet with parchment paper to prevent the tofu from sticking.

To prepare the tofu: Drain the tofu and use your palms to gently squeeze out some of the water. Slice the tofu into thirds lengthwise, so you have 3 even slabs. Stack the slabs on top of each other and slice through them lengthwise to make 3 even columns, then cut across to make 5 even rows (see photos).

@ KARIN SCHWAB Photo Credit

Line a cutting board with a lint-free tea towel or paper towel, then arrange the tofu in an even layer on the towel(s). Next, fold the towel(s) over the cubed tofu, then place something heavy (like another cutting board topped with a cast iron pan or large cans of tomatoes) to help the tofu drain. 

Let the tofu rest for at least 10 minutes (preferably more like 30 minutes if you have the time).

Transfer the pressed tofu to a medium mixing bowl and drizzle with the olive oil and tamari. Toss to combine. Sprinkle the starch over the tofu, and toss the tofu until the starch is evenly coated, so no powdery spots remain.

Tip the tofu bowl onto your prepared baking sheet and arrange the tofu in an even layer. Bake for 25 to 30 minutes, tossing the tofu halfway until the tofu is deeply golden on the edges. Use as desired.

NOTES: 

This blog post is all about celebrating good food—natural, sustainable food that delights the senses and nourishes the body.

 Kathryne is a self-taught photographer and cooks from Oklahoma. She started this blog in 2010 and named it after her canine sidekick, Cookie.

Thai Red Curry with Vegetables

Homemade Thai red curry recipe with vegetables! So much better than takeout.  You know dinner is good when you want to eat it for breakfast. Speaking of, it’s 10 am, and I’m writing with a happy belly. This Thai red curry made a fantastic meal last night and an even better breakfast this morning. It’s warm, comforting, and perfect for cool days. It’s a little rich, too, but so full of vegetables that it doesn’t feel too indulgent.

Thai red curry ingredients

I’ve been meaning to try a red Thai curry based on my green curry for a while now, and I’m so glad I finally did. It’s the best curry I’ve ever had, restaurant versions included! Yeah, I said it.

Bonus? You should be able to find everything you need for this simple curry at a well-stocked grocery store.

Thai Red Curry, Tips. The secret to making excellent Thai curries is to use plenty of aromatics, like onion, ginger, and garlic. Choose full-fat coconut milk for its richness (you won’t regret it!). Stirring in just a little bit of rice vinegar and sugar adds complexity.

Readily available store-bought Thai red curry paste adds characteristic Thai flavor; bonus, the Thai Kitchen brand is vegetarian. You can make your own if you’re so inclined, though. Feel free to change up the vegetables, as long as you slice them, so they’re all pretty small and about the same size. You could try broccoli, cauliflower, mushrooms, diced butternut, or sweet potato (which will probably require a longer cooking time), sliced zucchini, and/or yellow squash.

Tuesday, August 6, 2013

Summer Sunday Dinner on the Balcony


It is always so lovely to have a Summer Sunday dinner with friends, on a Sunday evening, just before the sunset, so we can have shimmering candles on the table and enjoy the view of the Chicago skyline from Susan's balcony.

Susan has really been crazy busy with the Culture Coach and everything else! She hosts the Night Out in the Parks, a partnership with the Chicago Park District and Elastic Arts. In addition, on Wednesdays, there is a Farmers Market event in Logan Square, so she is swamped staging these events through August.

I was working in California this Summer and had some great dinners with lots of my fellow artist, and now that I’m back in Chicago, she had us over for Sunday dinner.  Laurel is crazy busy pursuing her artistic side and has made a major investment in her love of making and designing jewelry.


Menu:
Appetizers
Salsa with  Lime Tortilla Chips
Goat Cheese, Crackers, and Olives (green/black)
Red Wine
Main Course:
Baked Sausage Apricot Glazed
Deviled Eggs
Quinoa
Dessert

Sparkling White Wine
Edy's Vanilla Ice Cream
Grandma Bev's Rhubarb Dessert (Rhubarb Crisp)
 

Quinoa contains more protein than any other grain. Edamame makes a tasty substitute for lima beans in this recipe. For an attractive presentation, serve the salad on a bed of baby greens or spinach.
Ingredients-1 1/2 cups uncooked quinoa                

  • 3 cups organic vegetable broth (such as Swanson Certified Organic)
  • 1 (14-ounce) package of reduced-fat firm tofu, cut into 1/4-inch cubes
  • 3 tablespoons olive oil, divided 
  • 1 1/4 teaspoons salt, divided
  • 1 cup chopped fresh basil 
  • 3 tablespoons fresh lemon juice
  • 2 tablespoons Dijon mustard
  • 1 teaspoon sugar 
  • 2 teaspoons grated lemon rind
  • 1/2 teaspoon freshly ground black pepper
  • 3 garlic cloves, minced
  • 1 (10-ounce) package frozen baby lima beans
  • 4 cups chopped tomato (about 3 medium) $
  • 1/2 cup sliced green onions
  • 1/2 cup chopped carrot
  • 1 (15-ounce) can of black  beans, rinsed and drained
 
Preparation
  1. Combine quinoa and vegetable broth in a saucepan; bring over medium-high heat. Cover, reduce heat, and simmer 15 minutes or until broth is absorbed and quinoa is tender. Remove from heat.
  1. Place tofu on several layers of towels; cover with additional paper towels. Let stand for 5 minutes. Heat 1 tablespoon oil in a large nonstick skillet over medium-high heat. Add tofu; sprinkle with 1/4 teaspoon salt. Sauté tofu 9 minutes or until lightly browned. Remove from heat; cool completely.
  1. Combine remaining 2 tablespoons oil, remaining 1 teaspoon salt, basil, and next 6 ingredients (through garlic) in a large bowl; stir with a whisk until blended. Stir in quinoa.
  1. Cook lima beans according to package directions, omitting salt and fat. Cool completely. Add the lima beans, tofu, chopped tomato, green onions, chopped carrot, and black beans to quinoa mixture; stir gently to combine. Store, covered, in the refrigerator until ready to serve.
Maureen Callahan, March 2006
DESSERT- served with EBY's Vanilla Ice Cream

recipe thumbnail
Grandma Bev's Rhubarb Dessert (Rhubarb Crisp)
star rating
12 Servings, Prep Time: 15 Minutes, Cook Time: 50 Minutes

This is one of Grandma Bev's recipes. She always had this waiting for my mother when we visited.
Ingredients
  • Crust:
  • 1 cup all-purpose flour
  • 5 tablespoons confectioners' sugar
  • 1/2 cup butter
  • Filling
  • 1 1/2 cups white sugar
  • 1/4 cup all-purpose flour
  • 3/4 teaspoon baking powder
  • 1/4 teaspoon ground nutmeg
  • 2 eggs, beaten
  • 3 cups chopped rhubarb
Directions
  1. Preheat oven to 350 degrees F (175 degrees C).
  1. Mix 1 cup flour and confectioners' sugar in a bowl; cut butter into flour mixture using a pastry cutter or two forks until the mixture is crumbly. Press flour-butter mixture into an 8-inch square pan.
  1. Bake crust in the oven until golden brown, 15 to 20 minutes.
  1. Mix white sugar, 1/4 cup flour, baking powder, and nutmeg into the beaten eggs. Fold rhubarb into egg mixture; pour rhubarb filling into the baked crust.
  1. Bake in the preheated oven until the filling is bubbling, 35 minutes.