Sunday, April 24, 2022

Earth Day Sunday Dinner Garlic Parmesan Baked Eggplant

Sunday dinners are back, now that Covid-19 indoor restrictions have lifted, I'm going back to inviting my inner circle to come and partake. RSVP and bring a side dish. Today the menu is 

Cornish Hens

Baked Eggplant 

Baby Spinach

Croissant Crescent Rolls

Chocolate Cup Cookies Extra Dark Chocolate Truffles

Anthony Ashmore

Ingredients 4 SERVINGS

1 eggplant (large)

6 Tbsp. unsalted butter (melted)

1 cup breadcrumbs

1/4 cup shredded Parmesan cheese

1/4 tsp. smoked paprika

1/2 tsp. garlic powder

1/2 tsp. Italian seasoning

You are here: Home / Side Dish / Garlic Parmesan Baked Eggplant Recipe

Garlic Parmesan Baked Eggplant Recipe

September 12, 2018, by Anna, Sharing is caring!

Garlic Parmesan Baked Eggplant – crispy baked, not fried, eggplant with garlic Parmesan breading. A delicious way to enjoy this fall vegetable!

If you enjoy eggplant, you may want to try my One Pot Chicken Ratatouille recipe of the easy, vegetarian Eggplant Lasagna.

garlic parmesan eggplant recipe 4 Garlic Parmesan Baked Eggplant Recipe 

Eggplant is in season, and I will show you one of my favorite dishes with this vegetable. It’s easy and can be served as an appetizer, side dish, or in main dishes, like Eggplant Parmesan. The garlicky Parmesan breading makes for a perfectly crispy coating even though the eggplant is baked and not fried.

If I am not roasting vegetables, I make my simple two-ingredient breading and bake them in the oven till crispy. No frying is required! I used this method in my Baked Artichoke Hearts recipe and my Best Roasted Garlic Parmesan Cauliflower recipe. It’s amazing!

HOW TO PREPARE EGGPLANT FOR COOKING?

Start by washing the eggplant and trimming off the green end. You can peel the skin if you like. Next, slice eggplant into 1/2″ disks. Place all disks in a colander or cooling rack set over a baking sheet, sprinkle with salt, and sit for at least 30 minutes. It helps cut the vegetable's bitterness and makes it “sweat.” You will notice tiny drops of moisture on the surface of the disks. Removing the water from the eggplant will prevent it from releasing it during cooking. You can use prepared like this eggplant in a variety of dishes.

HOW TO MAKE GARLIC PARMESAN BAKED EGGPLANT?

Prepare eggplant disks according to the instructions above. Melt butter in a bowl. Mix breadcrumbs, spices, and Parmesan cheese in another bowl. Dip each eggplant disk into butter first, then breading mixture. 

Place on aluminum foil or parchment paper-lined baking sheet. 

Bake in a 400 degrees F oven for 15 minutes, then flip each disk and bake for 7 more minutes. The eggplant should be golden brown and the breading crispy.


DO YOU NEED TO PEEL EGGPLANT BEFORE BAKING?

Eggplant skin is entirely edible. It’s a personal preference, just like zucchini. You can peel the skin off or leave it.

HOW TO SERVE CRISPY BAKED EGGPLANT?

You can serve it as a side dish, next to mashed potatoes and roasted chicken or pork loin. It also makes for a great appetizer, served with dips. You can also use this baked eggplant in place of a fried one when making Eggplant Parmesan. It’s easier since there is no frying required and healthier. You can also use it as a burger topping (think black bean burgers or healthy turkey burgers)!

Baked Eggplant Parmigiana

Ingredients

for 4 servings

DRY INGREDIENTS (BREADING):

4 large eggplants

1 cup of unseasoned breadcrumbs

½ cup parmesan cheese

1 tablespoon fresh parsley, chopped

2 tablespoons fresh basil, chopped

1 tablespoon salt

1 teaspoon black pepper

3 tablespoons flour

WET INGREDIENTS (BREADING):

4 eggs, beaten

4 tablespoons half & half

5 tablespoons olive oil

ASSEMBLY INGREDIENTS:

2 tablespoons olive oil

4 tablespoons fresh basil, chopped

¼ cup ricotta cheese

½ cup whole milk mozzarella, shredded

4 tablespoons parmesan cheese

2 cups marinara sauce (store-bought or homemade)

1 tablespoon salt

1 tablespoon pepper

¼ cup breadcrumb

Preparation

Cut one-inch circular slices of Eggplant from each eggplant with the skin on, discarding the stems and bottoms.

Once cut, individually dip each slice into a mixture of beaten eggs and half-and-half.

Then, dip each slice into the dry ingredient breadcrumb mixture until fully coated.

Finally, place breaded eggplant slices on a baking sheet that has been greased with 2 tbsp of olive oil.

Brush the top of each coated eggplant slice with the additional 3 tbsp of olive oil.

Place in an oven at 375°F for 10–15 Minutes.

After 10–15 Minutes, flip each eggplant slice over and bake for another 10-15 minutes.

In a new baking dish that has been greased with 2 tbsp olive oil, layer as follows:

Marinara sauce

Baked eggplant slices

A drizzle of olive oil

A light coating of ricotta cheese on each eggplant slice

A sprinkle of parmesan cheese

Sprinkle freshly cut basil leaves

A sprinkle of shredded mozzarella

A fair sprinkling of breadcrumbs

Repeat until you have 4-5 layers similar to the above-described layer.

Place the Layered Dish back into a 375°F oven for 10–15 minutes.

After 10–15 Minutes, broil the top layer on low for 5–6 Minutes.

Once out of the oven, let cool for 10–15 Minutes. Serve.

Enjoy

Baked Eggplant Parmigiana

Anthony Ashmore

Community Member

Delightful Cornish Hens


Ingredients

Original recipe yields 4 servings

Ingredient Checklist

1 green bell pepper, minced

1 red bell pepper, minced

¼ cup minced fresh cilantro, or more to taste

2 tablespoons olive oil

1 (.18 ounce) packet sazon seasoning

2 teaspoons onion powder

1 teaspoon adobo seasoning

salt and ground black pepper to taste

2 cloves garlic

2 onions, peeled 

2 Cornish game hens

2 tablespoons butter


I made these Chocolate fudge Cupcake cookies, with Dark Chocolate Truffle in the center. They were a big hit at the Environmental Nature Center's Earth Day Celebration, hosted by William Hill, the master gardener horticulturist. Just one thing they were left in the car and melted, but that made them even more delicious. 

Sunday, February 13, 2022

Drinking my coffee from My Saucer by John Paul Moore


Copied from a Facebook post by God Be With You.


My mother always drank her coffee like this! I thought it was because it was too hot.

Do you remember older generations drinking from their saucer?  Then today I came across this poem that made me feel there was symbolism to the coffee ritual.  

Drinking my coffee 

 from My Saucer 

by John Paul Moore

I’ve never made a fortune and it’s probably too late now.

But I don’t worry about that much, I’m happy anyhow.

And as I go along life’s way, I’m reaping better than I sowed.

I’m drinking from my saucer, ‘Cause my cup has overflowed.

I don’t have a lot of riches, and sometimes the going’s tough.

But I’ve got loved ones around me, and that makes me rich enough.

I thank God for his blessings, and the mercies He’s bestowed.

I’m drinking from my saucer, ’Cause my cup has overflowed.

I remember times when things went wrong, my faith wore somewhat thin.

But all at once the dark clouds broke, and the sun peeped through again.

So God, help me not to gripe about the tough rows that I’ve hoed.

I’m drinking from my saucer, ‘Cause my cup has overflowed.

If God gives me strength and courage, when the way grows steep and rough.

I’ll not ask for other blessings, I’m already blessed enough.

And may I never be too busy, to help others bear their loads.

Then I’ll keep drinking from my saucer, ‘Cause my cup has overflowed.

Friday, April 9, 2021

Crystallized Ginger - Candied Ginger

 One of my art friends on Facebook Kanika Marshal posted this recipe and for weeks I've been trying to make it. On the first try, I had cut the ginger, and started it with water, and search the cabinets and didn't have the granulated sugar. So make sure you have all the ingredients before starting this project. I used the liquid from the first boil as tea and put it in the refrigerator. Be careful because ginger is hot. 

Crystallized Ginger - Candied Ginger

Crystallized Ginger - Candid Ginger

Ingredients

  • 2 cup fresh ginger
  • 4 cups water
  • 1 cup sugar

Instructions

  1. Place the medium saucepan with water and sugar on the stove . Bring to a boil to dissolve the sugar.
  2. Add ginger to the sugar water and simmer on low heat for 1-1 ½ hours you can cut it in small cubes, juliennes, or round slices. Remove from heat and strain.
  3. Carefully move the ginger to a rack and sprinkle it with sugar. Let them dry for few hours in a cool dry place, turning them halfway through.
  4. Store in a sealed container. Reserved ginger syrup liquid can be used in Tea..cake, waffle.
  5. Store in an airtight container in the refrigerator

Sunday, February 21, 2021

OLD FASHIONED CANDIED YAMS

 OLD FASHIONED CANDIED YAMS


READY IN: 2hrs SERVES: 8

medium sweet potatoes, baked, peeled, and sliced in half lengthwise

2 1⁄2 cups water
1 1⁄3 cups packed dark brown sugar
4 tablespoons butter
1 1⁄2 teaspoons cinnamon
1 1⁄2 teaspoons vanilla


Authentic Soul Food Style Baked Candied Yams!

It’s been a long time coming, but the time is here- and I MUST share my recipe for some good old fashioned baked candied yams, soul food style! I refer to the baked candied yams as my soul food version, because these are the kind of candied yams that you would buy from an authentic soul food restaurant. These candied yams are so buttery, and tender. The practically melt in your mouth!

Although I uploaded a recipe for ” The Best Candied Yams Ever” a few years ago, this recipe will give that recipe a run for it’s money. Now don’t get me wrong- both recipes are amazing. However, if you’re looking for southern or soul food style candied yams, this is the recipe that you want. Also, these yams are actually easier to make because there are less cooking steps!

So now that I have your full attention, let me show and tell you how I make my Baked Candied Yams – Soul Food Style!


Welcome to my blog, I Heart Recipes!
This is Rosie, head blogger for I Heart Recipes. 

 I was born, and raised in the Pacific Northwest.. Seattle to be exact. I didn’t go to culinary school. I’m simply a self taught cook, that loves to experiment. I guess you can say that I’ve always been about that ” kitchen life”!

Today aside from being a busy homeschool mom & wife,  I am also full time food blogger, and social media influencer!

You can find me here (which is my main site iheartrecipes.com) , My YouTube Channel, on Facebook, and I’m also on Instagram!

Save

Friday, November 27, 2020

How to whip up a stellar pot pie from Thanksgiving leftovers

FOOD AND DINING


Save your Thanksgiving leftovers for a glorious Black Friday pot pie. Fill it with turkey and roasted vegetables from the holiday menu, then whip up an easy sauce to bring it all together. (Abel Uribe / Chicago Tribune)

Either way, there will be leftovers. I suspect that’s the case for most families in this year of the pandemic. Especially when cooking a whole turkey and a sheet pan full of vegetables.

So, let’s take a proactive approach and make a leftover plan. I’m strategizing for a turkey and roasted vegetable pot pie! After the big meal, I’ll stash away portions of the savory cooked items. Refrigerated promptly in covered containers, turkey and vegetable leftovers will keep for several days. When baking for a holiday, I’ll make a couple of extra pie crusts and stash them in the refrigerator or freezer. Then, create a rich, slightly smoky sauce to hold it together.

Pot pie — heck, any kind of homemade pie intimidates me. It helps to break the preparations into crust, filling, and sauce. With these parts ready, you’ll need to assemble and bake the pies about 1 hour before serving.

A top-only pie might baffle JeanMarie's husband, but it's a boon to the cook, she writes: No fail crispiness and easier crust work.
A top-only pie might baffle Jean Marie's husband, but it's a boon to the cook, she writes: No-fail crispiness and more accessible crust work. (Abel Uribe / Chicago Tribune)

My favorite timesaver is to make the pie dough several days in advance or simply use frozen or refrigerated pie crust. I am a fan of Trader Joe’s frozen pie crusts for their natural ingredients and crisp texture. The crusts are also generously sized, making working with them carefree. If your crust cracks or tears while rolling it out, no worries; just patch things together with your fingers. Rolling between sheets of floured wax paper makes transferring to the pie dish less traumatic.

Since I can’t stand soggy crusts, I prefer to make top-only pot pies (which baffles my husband). This approach proves a boon for the cook — no-fail crispiness and more accessible crust work. And fewer calories — always appreciated.

Cut a hole in the top so that steam can escape during baking.
Cut a hole in the top so that steam can escape during baking. (Abel Uribe / Chicago Tribune)

For the filling, reserve roast turkey and vegetables from Thanksgiving dinner. Alternatively, roast turkey breast tenders or chicken and some vegetables, or purchase roasted chicken and roasted vegetables from the grocery store or the local takeout shop.

You’ll need 3 generous cups of cooked turkey or chicken. Starting with fresh poultry, you’ll need about 2 pounds of boneless, skinless turkey tenders or chicken thighs. If you opt for chicken breast, avoid overcooking it during the roasting. The poultry can be roasted in advance and frozen; thaw in the refrigerator before using.

Crimp the edges for an attractive finish to your crust.
Could you cut the edges for an attractive finish to your crust? (Abel Uribe / Chicago Tribune)

To accompany the chicken in the filling, I add large chunks of roasted vegetables — not the bland celery, carrots, and peas found in freezer-case pot pies.

Nearly any vegetable that tastes well-roasted will taste great in the pie — from carrots and sweet potatoes to Brussels sprouts and parsnips. Know that 8 cups of diced raw vegetables yields 6 generous cups of roasted vegetables. Use assorted frozen vegetables for a speedier option. I substitute 2 bags (14 to 15 ounces each) of frozen roasted vegetables, such as Brussels sprouts and carrots or mixed potatoes and carrots, and then thaw them in the refrigerator for a couple of hours before tossing them with the chicken and sauce.

The cream sauce is easy — butter, flour-thickened chicken broth, cream flavored with smoked paprika, and plenty of fresh garlic. There is no judgment here if you choose bottled or canned cream sauce — refrigerated alfredo sauce also works well. Just remember that thicker sauces make for less runny pies.


Wednesday, April 8, 2020

Creole Shrimp Deviled Eggs | Deviled Egg Recipe


What are the Ingredients for Shrimp Deviled Eggs?
Aside from the bacon, shrimp, parsley, and seasoning, these ingredients are pretty standard for deviled egg recipes.

Typical deviled egg ingredients. I altered my original Deviled Egg recipe, but not by much. I simplified it by using only sexy Dijon mustard, which I love, instead of Dijon and yellow mustard.
Creole flavor. To up the Louisiana ante, I added Creole seasoning (already covered that) and a bit of hot sauce. The hot sauce is optional, depending on your taste, but those in the South tend to like hot foods.
Bacon. Not too much to say about that.

Shrimp. I was lazy and bought the small shrimp at the grocery seafood section, already peeled and deveined.

And I literally only got 24 shrimp, so I didn’t mind the extra $1.00 per pound since I wasn’t buying much, to begin with.

Did you know that “deviled eggs” literally means spicy eggs? In America, this kick comes from mustard and, maybe pepper, a little paprika. But in my shrimp deviled eggs recipe, we are all about the kick.

Wednesday, March 25, 2020

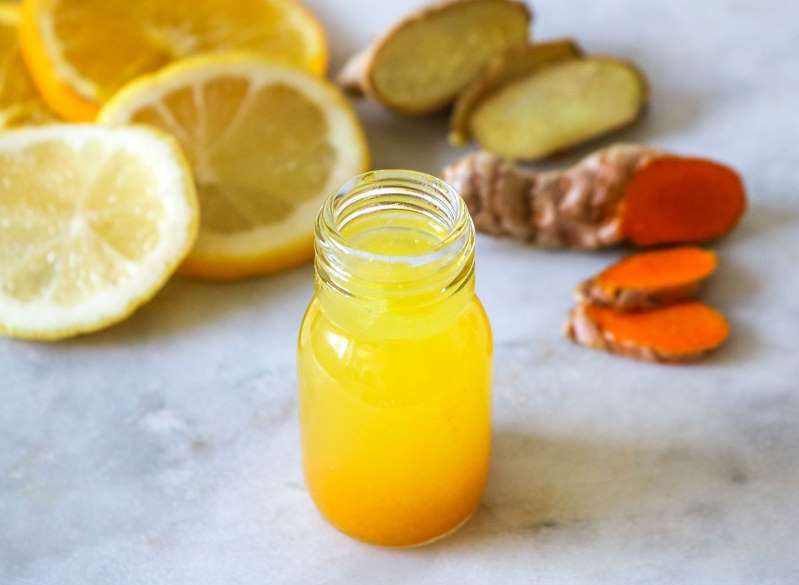
An Immune-Boosting Cider Recipe to Try During Quarantine

Fire Cider Recipe  original by Rebecca Firkser


Note: If the shot is too potent for your palate, try pouring it over ice and topping it with a splash of seltzer. Alternatively, make a tea with a shot or two of fire cider by pouring boiling water over it.


Fire cider recipe

Ingredients
1/4 cup freshly chopped garlic
1/4 cup freshly chopped ginger
1/4 cup freshly chopped horseradish
2 dried hot chiles, crushed (freshly chopped will also work)
1 Tbsp ground or freshly grated turmeric
1/2 tsp black peppercorns, crushed
1 orange, washed and quartered
1 lemon, washed and quartered
Apple cider vinegar
Honey

How To Make It
Combine garlic, ginger, horseradish, chiles, turmeric, and peppercorns in a clean quart-sized jar. Squeeze orange and lemon into the mixture and add the rinds. Stir well, then press the solids down to firmly pack them.

Pour in apple cider vinegar until the solids are completely covered (but don't fill the jar to the brim). If your jar's lid is metal, cover the top with a square of parchment paper before tightly sealing the lid—metal can react weirdly with vinegar, and no one wants that.
For quick cider: Transfer the jar to the fridge and let it steep for at least 12 hours. Use a wooden spoon to press down on solids to extract as much flavor as possible. Pour about 1 shot of the cider and mix in honey to taste. Take a shot (or a half-shot) every morning or whenever you feel under the weather. Finish within 1 month.

For OG slow cider: Transfer the jar to a cool, dark area in the kitchen, like a pantry or cabinet. Let the mixture steep, gently shaking the jar daily for three weeks. Use a wooden spoon to press down on the solids to extract as much flavor as possible, then strain out the solids and mix in honey to taste. Discard the solids and transfer the cider to the fridge. Take a shot (or a half-shot) every morning or whenever you feel under the weather. Finish within 1 month.


Any time I feel under the weather, I make a large batch of fire cider, an immune-boosting tonic of acidic, spicy things like garlic, ginger, horseradish, chiles, and apple cider vinegar, mixed with fresh citrus juice and honey. I take little shots of it throughout the day, letting its healing warmth run through my body.
© Provided by Eat This, Not That! immune-boosting shot
Similar in flavor to a shrub or a switchel, fire cider is often relied upon by herbalists to stop flu and cold symptoms in their tracks. Though a quick version can be mixed up overnight, a proper batch of fire cider takes a few weeks to brew.

As we work through daily life doing our best to prevent the spread of the novel coronavirus, a combined effort to practice social distancing means you'll have plenty of time to make a big batch of this fire cider. Or make a quick batch for now and an OG slower batch to freeze for later.
And for more quarantine ideas, don't miss these 20 Healthy Foods to Add To Your Coronavirus Grocery List.

What are the health benefits of fire cider?
The spicy components of the drinking aid in decongestion and warm the body; citrus brings immune-boosting vitamin C, while garlic and honey offer antibacterial support. Some believe strongly in the antiviral properties of these ingredients, but as much less research has been produced in that area, put only some of your faith in fire cider. The drink will still soothe a sore throat, clear your sinuses, and warm you to your core.

Though humans have made strong brews with natural ingredients to combat illness for generations, the actual term "fire cider" is widely attributed to herbalist Rosemary Gladstar, who wrote about the mixture in the 1980s. In her 1999 book Rosemary Gladstar's Herbs for the Home Medicine Chest, she recommends making a batch of fire cider as soon as cold and flu season hits (her recipe requires the mixture to rest for three to four weeks to reach utmost potency), and recommends taking a spoonful as soon as symptoms arise.

What goes into making fire cider?
Then, don't wait weeks to drink my fire cider. Because I consider the brew a symptom-soother and not my only form of medicine, I find it perfectly potent after an overnight steep.

Though you'll find one below, there's no authentic "recipe" for the mixture. It's more a matter of what I have and which flavors I want to lean into. More acidic spice? Crank up the amount of freshly grated horseradish. Want it super hot? Double the chiles and add all the seeds. And always add freshly chopped garlic and ginger, lots and lots of it. I don't typically use diced onion, but some swear by it. Then, the citrus: The puckery lemon is just as welcome for a sweeter slant, orange juice, and peel. Turmeric, freshly grated or powdered, and cracked black peppercorns are my favorite additions for a dose of anti-inflammatory agents.
Cram everything into a clean jar and cover with apple cider vinegar. At this point, you could pop the mixture in the fridge and let it sit out overnight.

How to properly brew the cider for weeks
If you're interested in letting your fire cider brew for a few weeks, there are a few things to which you should pay closer attention.

Make sure your jar has a lid that can create an airtight seal. This is the time for a Mason jar, not a repurposed salsa jar. Make sure your pot is fresh-out-of-the-dishwasher sanitized.
Take extra caution to pack down the solid ingredients and cover them entirely with vinegar.
Move the jar to a cool, dark area in the kitchen, like a pantry or cabinet. Let the mixture steep, gently shaking the jar daily for three weeks.


Thursday, December 5, 2019

Soak Your Nuts Cleansing with Karyn

In the month of November, I started my mornings with Turmeric/Curcumin supplements: turmeric in my coffee, and a weekly cleansing of my system. My cousin Cece has sworn that its more than just a kitchen spice, turmeric—and its main compound curcumin—have long held an important place in herbal wellness traditions. It worked for her she was having problems with arthritis and inflammation in her knees, she had to do something to take the weight off.
I can home from New York, took the organic turmeric out of the cabinet and started the journey to save my own life. 
One of the artists here at the Bronzeville Artist Lofts has started a book share library, where books are left out for all to enjoy and contribute as well.  While browsing through I found these two books by Karyn Calabrese, "Cleansing With Karyn", and "Karyn's Conscious Comfort Foods, Vegan Fare". I grabbed them up as tools for my year-long pledge to self that I am going to go through detoxification, healing myself from all these toxins I've put into my body.


A student of Dr. Ann Wigmore and Viktoras Kulvinskas, Karyn Calabrese used raw food and detoxification to heal herself from illness, fatigue, and allergies. Soak Your Nuts: Cleansing with Karyn, features her Nature’s Healing System, a 28-day program that has helped thousands of her students overcome weight issues, skin problems, fibromyalgia, insulin dependence, insomnia, sinusitis, and countless other health problems.

The program is designed to counter the effects of exposure to chemicals, other environmental pollutants, and stress; restore the body’s balance, and revive its ability to rejuvenate naturally.
Instead of dieting and counting calories, readers will learn how to use a raw natural diet, juicing, fasting, and internal cleansing to gain a new awareness of total body health. As a result, they will be equipped with the tools to make intelligent, responsible, health-promoting diet and lifestyle choices. Karyn’s sense of humor and messages of self-love and acceptance make this program a truly holistic journey.

Tuesday, November 26, 2019

Classic Turkey Pot Pie


I am craving, a turkey pot pie this Thanksgiving, and plan on making it this year. Here is a recipe I am dreaming about, you can tweak it for whatever you prepared for thanksgiving using leftover . Alpha
Crust: refrigerated pie crusts are my shortcut, but you can buy this rolled, in a box, or from scratch.
filling ingredients
1/3  cup butter or margarine
1/3  cup chopped onion
1/3  cup all-purpose flour
½     teaspoon salt
¼      teaspoon pepper 
1       can (14 oz) chicken broth
½     cup milk
2 ½  cups shredded cooked turkey
2       cups frozen mixed vegetables, thawed
Steps
Heat oven to 425°F. Make pie crusts as directed on the box for Two-Crust Pie, using a 9-inch glass pie plate.
In a 2-quart saucepan, melt butter over medium heat. Add onion; cook 2 minutes, stirring frequently, until tender. Stir in flour, salt, and pepper until well blended. Gradually stir in broth and milk, cooking and stirring until bubbly and thickened.
Stir in turkey and mixed vegetables. Remove from heat. Spoon into a crust-lined pie plate. Top with the second crust; seal the edges and flute. Cut slits in several places in the top crust.
Bake 20 minutes; cover the edge of crust with strips of foil to prevent excessive browning. Bake an additional 15 to 20 minutes or until the crust is golden brown. Let stand 5 minutes before serving.
THE BACKSTORY
It's hard to find a more comforting dish than a classic pot pie. Sometimes called meat pot pie, the traditional recipe is typically filled with some type of protein, mixed vegetables, potatoes, chicken broth, and flour inside a flaky pastry crust. Surprisingly, the humble pot pie has a colorful history dating back to the Roman Empire, when it was a common dish served at royal banquets. Instead of tender chicken, beef, or turkey, these historical pot pies were often filled with live birds!
Pot pie became a standard dinner in Europe around the 16th century and was later introduced to America by English settlers. Now, pot pie is commonplace and has found a longstanding spot in weekly dinner rotations.
The savory pie has certainly come a long way since its origin, and today there are plenty of different methods to bake the savory meat pie, along with endless twists on the classic recipe. You can make pot pie with biscuits instead of pie crust, make the filling on the stove or in the slow cooker, bake the pie in a casserole dish or pie plate, or even bake it in a skillet or muffin tin!
This dish is easy to adapt by simply swapping out the filling. The flavor options are endless with twists like buffalo chicken pot pie, chili pot pie, or even pizza pot pie. Whatever you're craving, we have every pot pie and casserole recipe you could ever dream of.
Expert Tips
Beat an egg with a spoonful of water and brush it over the top dough before baking for a glossy, golden crust.
Use a small cookie cutter to cut vent holes in the top crust before adding the filling. Attach the dough cut-outs around the edge of the pie using a little beaten egg to adhere.
A ¼ to ½ teaspoon of poultry seasoning, which is heavy in dried sage, stirred into the filling is the natural complement to a turkey pot pie.
Use leftover holiday turkey or a rotisserie chicken for the filling—and if you have leftover roasted or sautéed vegetables (like peas, broccoli, or green beans), coarsely chop them up and stir into the sauce in place of the frozen veggies.


Friday, November 22, 2019

Experimental Station is Making Traditions with Sit Down Meals and Conversation

Experimental Station is making traditions this month over sit-down meals and conversations.
Experimental Station Big Room


Veronica DeFillo in the green shirt and at the head of the table.

I got this email invitation from Matthew Searle (he/him), Assistant Director, Experimental Station.

"Hi Alpha, it happens to be a magnificent week for eating here at the building. Please look at these special opportunities to connect over food and let me know what you can join. Note that these are all sit-down meals rather than chances to take food on the go." Matthew Searle

So, after reading the list, I RSVP for Thursday's lunch with Veronica DeLillo.  
Thursday at 12PM (11/21) - meet a wonderful neighbor, Veronica Defillo, who lives across the street on Dorchester. 

Veronica came to our soup dinner a few weeks ago, and I found out she makes incredible Gumbo in our ensuing conversations. She is making a giant pot of this Gumbo and has invited more neighbors and community stakeholders to come and share this meal in the Big Room.


Veronica is originally from Arkansas. Before migrating to Chicago, her formal education, courtship, and married life were in NOLA. There she learned the culture of cooking Gumbo. It was a family affair where all her in-laws, aunties, cousins came together to make the stew.

The Gumbo was the star of the table.

She recalled it as a festive time, cleaning the seafood, cutting and dicing the vegetables: onions, garlic, celery, bell pepper, parsley, and okra. Each family contributed meats like ham hocks, pork shank, hotlinks, cracked chicken wings, shrimp, and crabs. She didn't share her secret to the Roux with me, but she said she put the okra in last so it would be firm.  Roux (pronounced "roo") is the foundation for many Cajun and Creole recipes, from gravies to sauces and soups to gumbos. Though simple in nature, Roux brings incredible flavor to so many recipes. Roux is a cooked mixture of flour and fat (oil, butter, or lard) used as a thickening agent.

Veronica says she loves to play cards, so making Gumbo was filled with trash-talking, "Bid Whist," "Spades," and lots of whooping and hollering, and some good old family partying and toasting, waiting on the Gumbo to be ready.

Assistant Director, Experimental Station
6100 S. Blackstone Ave., Chicago, IL 60637 USA
office: 773.241.6044; alt: 773.270.2502
experimentalstation.org | FB | Twitter | Instagram

I like a medium to dark brown Roux; I avoid putting tomatoes in my gumbo or anything that looks like a paste. The trick is the timing.
Medium Brown Roux: If you cook the roux for 20 minutes, you will get a medium brown roux that should be the color of a copper pot.
Dark Brown (Chocolate) Roux: When you cook the roux for 25+ minutes, you will end up with a dark brown roux the color of dark chocolate. Alpha Bruton

How to Make a Louisiana Roux: This is the traditional method for making a roux using equal parts of oil and flour.

  • 1 cup oil
  • 1 cup flour
Method of Preparation:
  1. Heat oil over medium heat until hot in a heavy skillet (Cast-Iron Skillet).
  2. Add flour gradually, stirring or whisking, to combine with the oil.

  3. After adding all the flour, reduce the heat to low and cook, frequently stirring. About 45 to 60 minutes or until Roux ranges from a peanut butter color to a dark brown (red-brown or the color of milk chocolate, and has a nut-like odor (it will be very thick and pasty).

  4. This process takes some time, depending on how high the heat on your stove is. The slower, the better, but be ready to remove the skillet from the heat and stir more rapidly if the Roux is too hot.
    If you stop stirring – the flour will burn. So never walk away from the Roux. The secret to getting a perfect roux is to take your time and go constantly.

  5. When done to your liking, immediately remove from heat and set aside.
  6. Carefully transfer it into your stockpot and start making Gumbo or other recipes.

Sunday, May 5, 2019

Sunday dinner: The family tradition we need to bring back

Reposted for: Maskot / Getty Images, May 5, 2019, 10:01 AM CDT, By Ronnie Koenig


Easter Sunday Dinner with Ladipo and Adero


Easter Sunday Brunch - Dinner: April 21st, 2019

Two of my favorite young couple joined me Easter for brunch/afternoon dinner, Adero and I met up in our neighborhood Walmart and planned menu and planned on joining me since our families live out of town.

MENU: 
Chicken and waffles, 
pineapple toast, 
fresh fruit, 
Kale carrot salad, 
deviled eggs, 
Chicken and Waffles, pineapple-toasted strips as appetizers.


Fresh-cut fruit and berries as a centerpiece


Adero picked  me up a beautiful bouquet of flowers  

My favorite celebration punch:

Recipe:  White grape juice, White Sparkling Cider,
Moscato Wine is loaded with fresh fruit, topped off with Champagne.

This is an article I read this morning while planning for the May 2019 Sunday Salon Series, which has been "Sunday Dinner"  since late 2007 when I began this blog spot. Alpha Bruton

Want a way to stay connected to the family? It’s time to bring back the tradition of gathering around the dinner table. A happy multi-generational family toasting drinks at the table during a garden party. 

Studies show that there are cognitive, psychological, and physical benefits of dining together.

When I was a kid growing up on Long Island, Sunday dinner was a thing. We never mentioned it, but everyone just knew that the end of the weekend meant we had a long-standing date with my maternal grandparents. It was a time to hang out at home, visit your relatives, and grab a kosher deli. Back then, the platters of sliced pastrami and whole-sour pickles didn’t hold any special significance to me. But now, as an adult with 100 miles separating me from my nearest family members, I’m realizing the importance of this designated family time.

“The family that eats together thrives together,” says Dr. Vanessa Lapointe, a registered psychologist and parenting expert. “Mealtime has historically been a time of family togetherness. Plus, if you’re getting multiple generations together, then there is a tapestry of diversity in terms of ages and interests, and that is just so good for kids.”


My childhood was influenced significantly by having my grandparents within a short driving distance and my aunt, uncle, and cousin within walking distance. While my seven-year-old twins know and love their family, visits are sometimes few and far between, unless it’s someone’s birthday, holiday, or another special occasion that necessitates a visit. Around the New Year, I decided that this wasn’t ok. After losing my dad a few years ago, I’ve started to realize that these moments together aren’t guaranteed. I wanted our family to be connected and not just in a catch-up-every-once-in-a-while way. So, without telling anyone, I started a Sunday night dinner tradition.

“We’re coming over,” I announced to my mom on the phone one Sunday morning, and within hours, my sister, my cousin, and I descended on her home bearing salad, wine, and all the ingredients to make the Pioneer Woman’s Baked Ziti. (If you haven’t made it, you need to, STAT!) We all have busy schedules — errands to run, work to do, kids to shuttle around — but for a few hours that Sunday evening, we decided to take a break from it all. The best part was that it was for no reason other than it was Sunday. It wasn’t anyone’s birthday or graduation, but there we were, all gathered around the table together.

Anne Fishel, Ph.D., a family therapist and founder of The Family Dinner Project, a non-profit initiative that encourages families to connect over mealtime, tells me that there are numerous benefits of families eating together. “The benefits range from the cognitive ones (young kids having bigger vocabularies and older kids doing better in school) to the physical ones (better cardiovascular health, lower obesity rates and eating more vegetables and fruits) to psychological ones (lower rates of depression, anxiety, eating disorders, substance abuse and fewer behavioral problems in school).”


Fishel says that what’s for dinner doesn’t matter — it’s the communal environment that you create that makes all the difference.