Tuesday, January 31, 2023

Crispy Baked Tofu

 
@ KARIN SCHWAB Photo Credit

Let’s talk about tofu! Even as a vegetarian, I don’t eat a ton of it. When I do, however, I want it crispy, and crispy tofu is an elusive beast. I’ve shared this method here and here, but I’ve gotten such fantastic feedback that I wanted to highlight it.

Even tofu skeptics love this tofu. Try it, and you will see it!

INGREDIENTS
1 block (12 to 15 ounces) of organic extra-firm tofu
1 tablespoon extra-virgin olive oil
1 tablespoon tamari* or soy sauce
1 tablespoon cornstarch or arrowroot starch
Tips for Irresistibly Crispy Tofu

1) Choose the right kind of tofu.

Extra-firm tofu is the only way to go, and I’ve found that the Trader Joe’s brand is the most firm of them all (plus, it’s only two dollars). It’s also organic, essential when buying tofu because soy is conventionally treated with fertilizers, herbicides, and insecticides. Look for tofu in the refrigerated section by the produce.

2) Squeeze out as much moisture as possible.

Water-logged tofu always gets somewhat crispy. The key here is to slice the tofu into pieces before pressing it. Have you ever tried pressing a whole block or even two halves? They just sit in soggy puddles. Instead, slice them into smaller pieces to maximize the surface area. Press those, and you’ll extract more moisture—faster, too.

3) Toss your tofu in oil, soy sauce, and starch.

Now, you just need to toss your tofu in a bit of oil (just 1 tablespoon for the whole batch), tamari or soy sauce (for some flavor), and cornstarch or arrowroot starch. The starch makes the edges extra crispy and irresistible (I got this idea from The Kitchen).

Cornstarch vs. arrowroot: You might be wondering which starch is better. Cornstarch is a more processed ingredient, but it yields the crispiest results. Arrowroot is less processed and works well, but the outer covering can become slippery and strange if you add tofu to a dish containing a lot of moisture (like curry).

4) Bake it.

Spread your prepared tofu in an even layer across a sheet pan. Don’t worry if your tofu fell apart as you tossed it. Bake until golden brown, about 25 to 30 minutes. Boom! Perfect tofu.

Why Bake Your Tofu?
Some swear by cooking their tofu in a skillet, but it never turns out well in my cast iron skillets. It sticks, and the crispy bits end up sticking to the pan, a tofu tragedy. Plus, it requires more oil, and you don’t need much oil to get crispy tofu.
When you bake your tofu, you give it time to develop crispy edges and warm, pillowy insides. It’s simply the best.

@ KARIN SCHWAB Photo Credit

@ KARIN SCHWAB Photo Credit

Uses for Crispy Baked Tofu
If you want to infuse your tofu with more flavor, I recommend adding sauce after it’s baked rather than marinating it. Why? Water-logged tofu isn’t very good at absorbing flavor (something I always suspected, which was confirmed by Deborah Madison via Serious Eats).

So, bake your tofu in the oven to crispy perfection, then cook it in sauce, or drizzle sauce on top. This tofu is perfect for tossing into any recipe with Asian flavors or any recipe that could benefit from some hearty vegetarian protein. For example, it would be great in my Thai red curry or green curry.

You could replace the eggs in my kale, coconut fried rice, and Thai pineapple fried rice with this tofu. It is fantastic, with peanut sauce drizzled on top in any form. (Fun fact: my crispy tofu and peanut sauce collide in my cookbook!)

INSTRUCTION

Preheat the oven to 400 degrees Fahrenheit and line a large, rimmed baking sheet with parchment paper to prevent the tofu from sticking.

To prepare the tofu: Drain the tofu and use your palms to gently squeeze out some of the water. Slice the tofu into thirds lengthwise, so you have 3 even slabs. Stack the slabs on top of each other and slice through them lengthwise to make 3 even columns, then cut across to make 5 even rows (see photos).

@ KARIN SCHWAB Photo Credit

Line a cutting board with a lint-free tea towel or paper towel, then arrange the tofu in an even layer on the towel(s). Next, fold the towel(s) over the cubed tofu, then place something heavy (like another cutting board topped with a cast iron pan or large cans of tomatoes) to help the tofu drain. 

Let the tofu rest for at least 10 minutes (preferably more like 30 minutes if you have the time).

Transfer the pressed tofu to a medium mixing bowl and drizzle with the olive oil and tamari. Toss to combine. Sprinkle the starch over the tofu, and toss the tofu until the starch is evenly coated, so no powdery spots remain.

Tip the tofu bowl onto your prepared baking sheet and arrange the tofu in an even layer. Bake for 25 to 30 minutes, tossing the tofu halfway until the tofu is deeply golden on the edges. Use as desired.

NOTES: 

This blog post is all about celebrating good food—natural, sustainable food that delights the senses and nourishes the body.

 Kathryne is a self-taught photographer and cooks from Oklahoma. She started this blog in 2010 and named it after her canine sidekick, Cookie.

Thai Red Curry with Vegetables

Homemade Thai red curry recipe with vegetables! So much better than takeout.  You know dinner is good when you want to eat it for breakfast. Speaking of, it’s 10 am, and I’m writing with a happy belly. This Thai red curry made a fantastic meal last night and an even better breakfast this morning. It’s warm, comforting, and perfect for cool days. It’s a little rich, too, but so full of vegetables that it doesn’t feel too indulgent.

Thai red curry ingredients

I’ve been meaning to try a red Thai curry based on my green curry for a while now, and I’m so glad I finally did. It’s the best curry I’ve ever had, restaurant versions included! Yeah, I said it.

Bonus? You should be able to find everything you need for this simple curry at a well-stocked grocery store.

Thai Red Curry, Tips. The secret to making excellent Thai curries is to use plenty of aromatics, like onion, ginger, and garlic. Choose full-fat coconut milk for its richness (you won’t regret it!). Stirring in just a little bit of rice vinegar and sugar adds complexity.

Readily available store-bought Thai red curry paste adds characteristic Thai flavor; bonus, the Thai Kitchen brand is vegetarian. You can make your own if you’re so inclined, though. Feel free to change up the vegetables, as long as you slice them, so they’re all pretty small and about the same size. You could try broccoli, cauliflower, mushrooms, diced butternut, or sweet potato (which will probably require a longer cooking time), sliced zucchini, and/or yellow squash.

Sunday, January 15, 2023

Grandma's Cooking Recipes Jerk Lemon Pepper Salmon

 Ayour Haloui


Ayour Haloui

jerk lemon pepper salmon 

Ingredients

1 or 2 pieces of Salmon (about 1 ½ lbs)

2 T Butter

1 T Peanut or Canola Oil only

1 lemon sliced

Roasted vegetables (Sea rodeo under, ‘Vegetables’)

2 T Jerk Seasonings (blend)

1 T Salt

1 T Black Pepper

½ T Chile Powder

¼ T Red Pepper Flakes

¼ T Paisley

2 tap Papdka

1 T Thyme

1 T Cinnamon

½ Nutmeg

½ All Spice

1 T Brown Sugar (diabetic diets omit brown sugar)

Lemon Pepper Seasoning:

1 T Salt

1 T Cracked Black Pepper

1 T Lemon Zest

Directions

Fleet skillet to Mien add butter, Peanut, or Canola oil.

Rinse salmon and pat dry. Pour a drizzle of oil over it. Season all sides with your Jerk and Lemon Pepper seasonings.

When the butter is melted and beginning to brown, and the pan is slightly smoking, gently add salmon Sear for 2-3 mins. The Salmon should be somewhat charred after flipping.

Next, place Salmon and sliced lemons in light grease. Oven-safe dish. Broil on high on the center rack for 8-10 mins until cooked thru. Splash with lemon juice immediately once removed roasted veggies are.

Number of Servings: 2-4

Prep Time: 15 minutes

Personal Notes: PRO TIP: This method is called pan searing. Make sure your butter begins to brown before adding.

Salmon. This will give the salmon that charred seasoned coating.

Enjoy 

Saturday, January 7, 2023

How to Eat to Live- 2023

 At the end of 2022, I was diagnosed with diabetes and was immediately given insulin injections to bring my A1C down.   I have a family history of diabetes but lived all my adult life with the threat of it lingering over me, but I controlled it with diet and watching what I eat. The ending of 2022 and the beginning of 2023 have changed my life substantially. So this year will be a journey and blogging about dishes that teach us how to eat to live. 

Book Overview - I remember having a copy of this book in the 1980s, and I prepared food for my family and practiced cooking around recipes that encouraged good diets. 

Do you want to eat delicious food that allows you to lose weight and keep it off permanently without hunger or deprivation? Do you want to throw away your medications and recover from chronic illnesses such as heart disease, high blood pressure, and diabetes? Do you want to maintain good health, live longer, and enjoy life to the fullest? If you said yes to any of these, then the Eat to Live Cookbook is for you. Through his #1 New York Times bestselling book Eat to Live, Joel Fuhrman, M.D., has helped millions of readers worldwide discover the most effective, healthy, and proven path to permanent weight loss. Now the Eat to Live Cookbook makes this revolutionary approach easier. Filled with nutritious, delicious, and easy-to-prepare recipes for every occasion, the Eat to Live Cookbook shows you how to follow Dr. Fuhrman's life-changing program as you eat your way to excellent health.


Book Overview
Despite what you might have heard, diabetes is not a lifelong condition. It does not have to shorten your life span or result in high blood pressure, heart disease, kidney failure, blindness, or other life-threatening ailments. In fact, most diabetics can get off medication and become 100 percent healthy in just a few simple steps. 

 The End of Diabetes, Dr. Joel Fuhrman shows how to prevent and reverse diabetes and its related symptoms and lose weight. The End of Diabetes is a radical idea wrapped in a simple plan: Eat Better, End Diabetes. While the established medical protocol aims to control diabetes by limiting carbohydrate intake, monitoring glucose levels, and prescribing bottomless doses of medicine, Dr. Fuhrman believes this long-standing approach to fighting diabetes is wrong--and possibly fatal. 

Designed for anyone ready to enjoy a healthier and longer life, Dr. Fuhrman's plan is based on a single formula: Your Health Future (H) = Nutrients (N) / Calories (C). According to Dr. Fuhrman, foods with a high nutrient density turn our bodies into the miraculous, self-healing machines they can be, resulting in significant weight loss, improved health, and, ultimately, the end of diabetes and other diseases. In engaging, direct, and easy-to-follow language, The End of Diabetes supplies the science and clinical evidence to prove that diabetes, heart disease, and high blood pressure are not inevitable consequences of aging. Instead, they are reversible and preventable. This simple and effective plan offers great food, starts working immediately, and puts you on a direct path to a longer, better, fuller, disease-free life.


Friday, December 30, 2022

NEW ORLEANS PORK GUMBO

https://www.food.com/amp/recipe/new-orleans-pork-gumbo-171548


My sister Diana sent me this recipe, and we went back and forth about what she puts in her Gumbo and what is traditional. I haven't used succotash and cut okra in my Gumbo, but some folks like it that way. It can be made with all sorts of ingredients. If you aren't a pork eater, just omit the pork tenderloin. Some cooks use lean beef and prepare this dish in the same manner.

READY IN: 35 mins

SERVES: 4

INGREDIENTS

1  lb  pork tenderloin

 nonstick cooking spray

1  tablespoon butter

2  tablespoons all-purpose flour

1  cup water

1 (16 ounce) can of stewed tomatoes, undrained

1 (10-ounce) package of frozen cut okra

1 (10-ounce) package of frozen succotash

1  beef bouillon cube

1  teaspoon black pepper

1  teaspoon  hot pepper sauce

1  bay leaf

DIRECTIONS

Sliced pork into 1/2-inch cubes. Spray a large Dutch oven with cooking spray. Heat over medium heat until hot. Add pork; cook and stir for 4 minutes or until pork is browned. Remove the pork from the Dutch oven. Melt butter in the same Dutch oven. Stir in flour.

Cook and stir until the mixture is dark brown but not burned. Gradually whisk in water until smooth.

Add pork and the remaining ingredients. Bring to a boil. Reduce heat to low; simmer for 15 minutes.

Remove bay leaf before serving.

DID YOU MAKE THIS?

Tell us how it came out or how you tweaked it, add your photos, or get help.

DINNER DAILY NEWSLETTER

Ever know exactly what to make after a hard day’s work? Us either. Take the guesswork out of dinner with these sure-fire meals, delivered right to your inbox.


Wednesday, December 28, 2022

Big Charlie's Gumbo

GUMBO RECIPE- My sister Diana Bruton shared this recipe with me. We were having a discussion of what goes in gumbo and various ways to prepare it. 


This is a basic gumbo recipe with a lot of added flavor. You can omit the stew meat or add something in its place. I recommend you serve this recipe over rice, like many other gumbo recipes. I like to add crabmeat to this hearty soup as well. Serve over rice with crusty French bread. Garnish with fresh parsley.

Recipe by Eric Bernabe  Updated on September 12, 2022

Prep Time: 30 mins

Cook Time: 3 hrs 30 mins

Total Time: 4 hrs

Servings: 10

Ingredients

2 tablespoons butter

3 cloves garlic, minced

2 cups chopped onion

¾ cup chopped celery

1 pound okra, chopped

¼ cup butter

¼ cup all-purpose flour

½ pound cubed beef stew meat (Optional)

8 cups water

1 (16 ounce) can of whole tomatoes, undrained and chopped

1 ½ teaspoon white sugar

1 ½ tablespoon chopped fresh parsley

1 sprig of fresh thyme

2 bay leaves

1 pinch salt

½ teaspoon ground cayenne pepper

1 pinch of ground black pepper

1 pound andouille sausage, cut into 1/2-inch pieces

½ pound crabmeat, flaked

1 pound medium shrimp - peeled and deveined

½ teaspoon hot pepper sauce

¼ cup Worcestershire sauce

½ lemon

file powder (see Note)

Directions

Melt butter in a large skillet over medium heat. Cook garlic, onions, celery, and okra, constantly stirring, until golden brown. Set aside.

In a large heavy-bottomed stock pot over medium-high heat, combine 1/4 cup butter and flour. Cook, constantly stirring, until the roux becomes chocolate brown. Stir in the vegetable mixture and stew meat. Cook, stirring, until vegetables are tender and meat is evenly brown. Stir in water, tomatoes, and sugar. Season with parsley, thyme, bay leaves, salt, cayenne, and black pepper. Bring to a boil, reduce heat, and simmer for 2 1/2 hours, stirring occasionally.

Add shrimp, crabmeat, and andouille to the stock pot. Stir in hot pepper sauce and Worcestershire sauce. Remove the seeds from the lemon and squeeze the juice into the stock pot. Simmer for an additional 10 minutes, stirring occasionally. Remove bay leaves, sprinkle with filé powder, and serve over rice.

Tips

Filé powder can be added off the heat to thicken the gumbo. It may become stringy and unpleasant if added while the gumbo is still cooking. Fil é powder is ground sassafras leaves. It is available in many supermarkets.

Tuesday, December 27, 2022

A SHORT HISTORY OF GUMBO

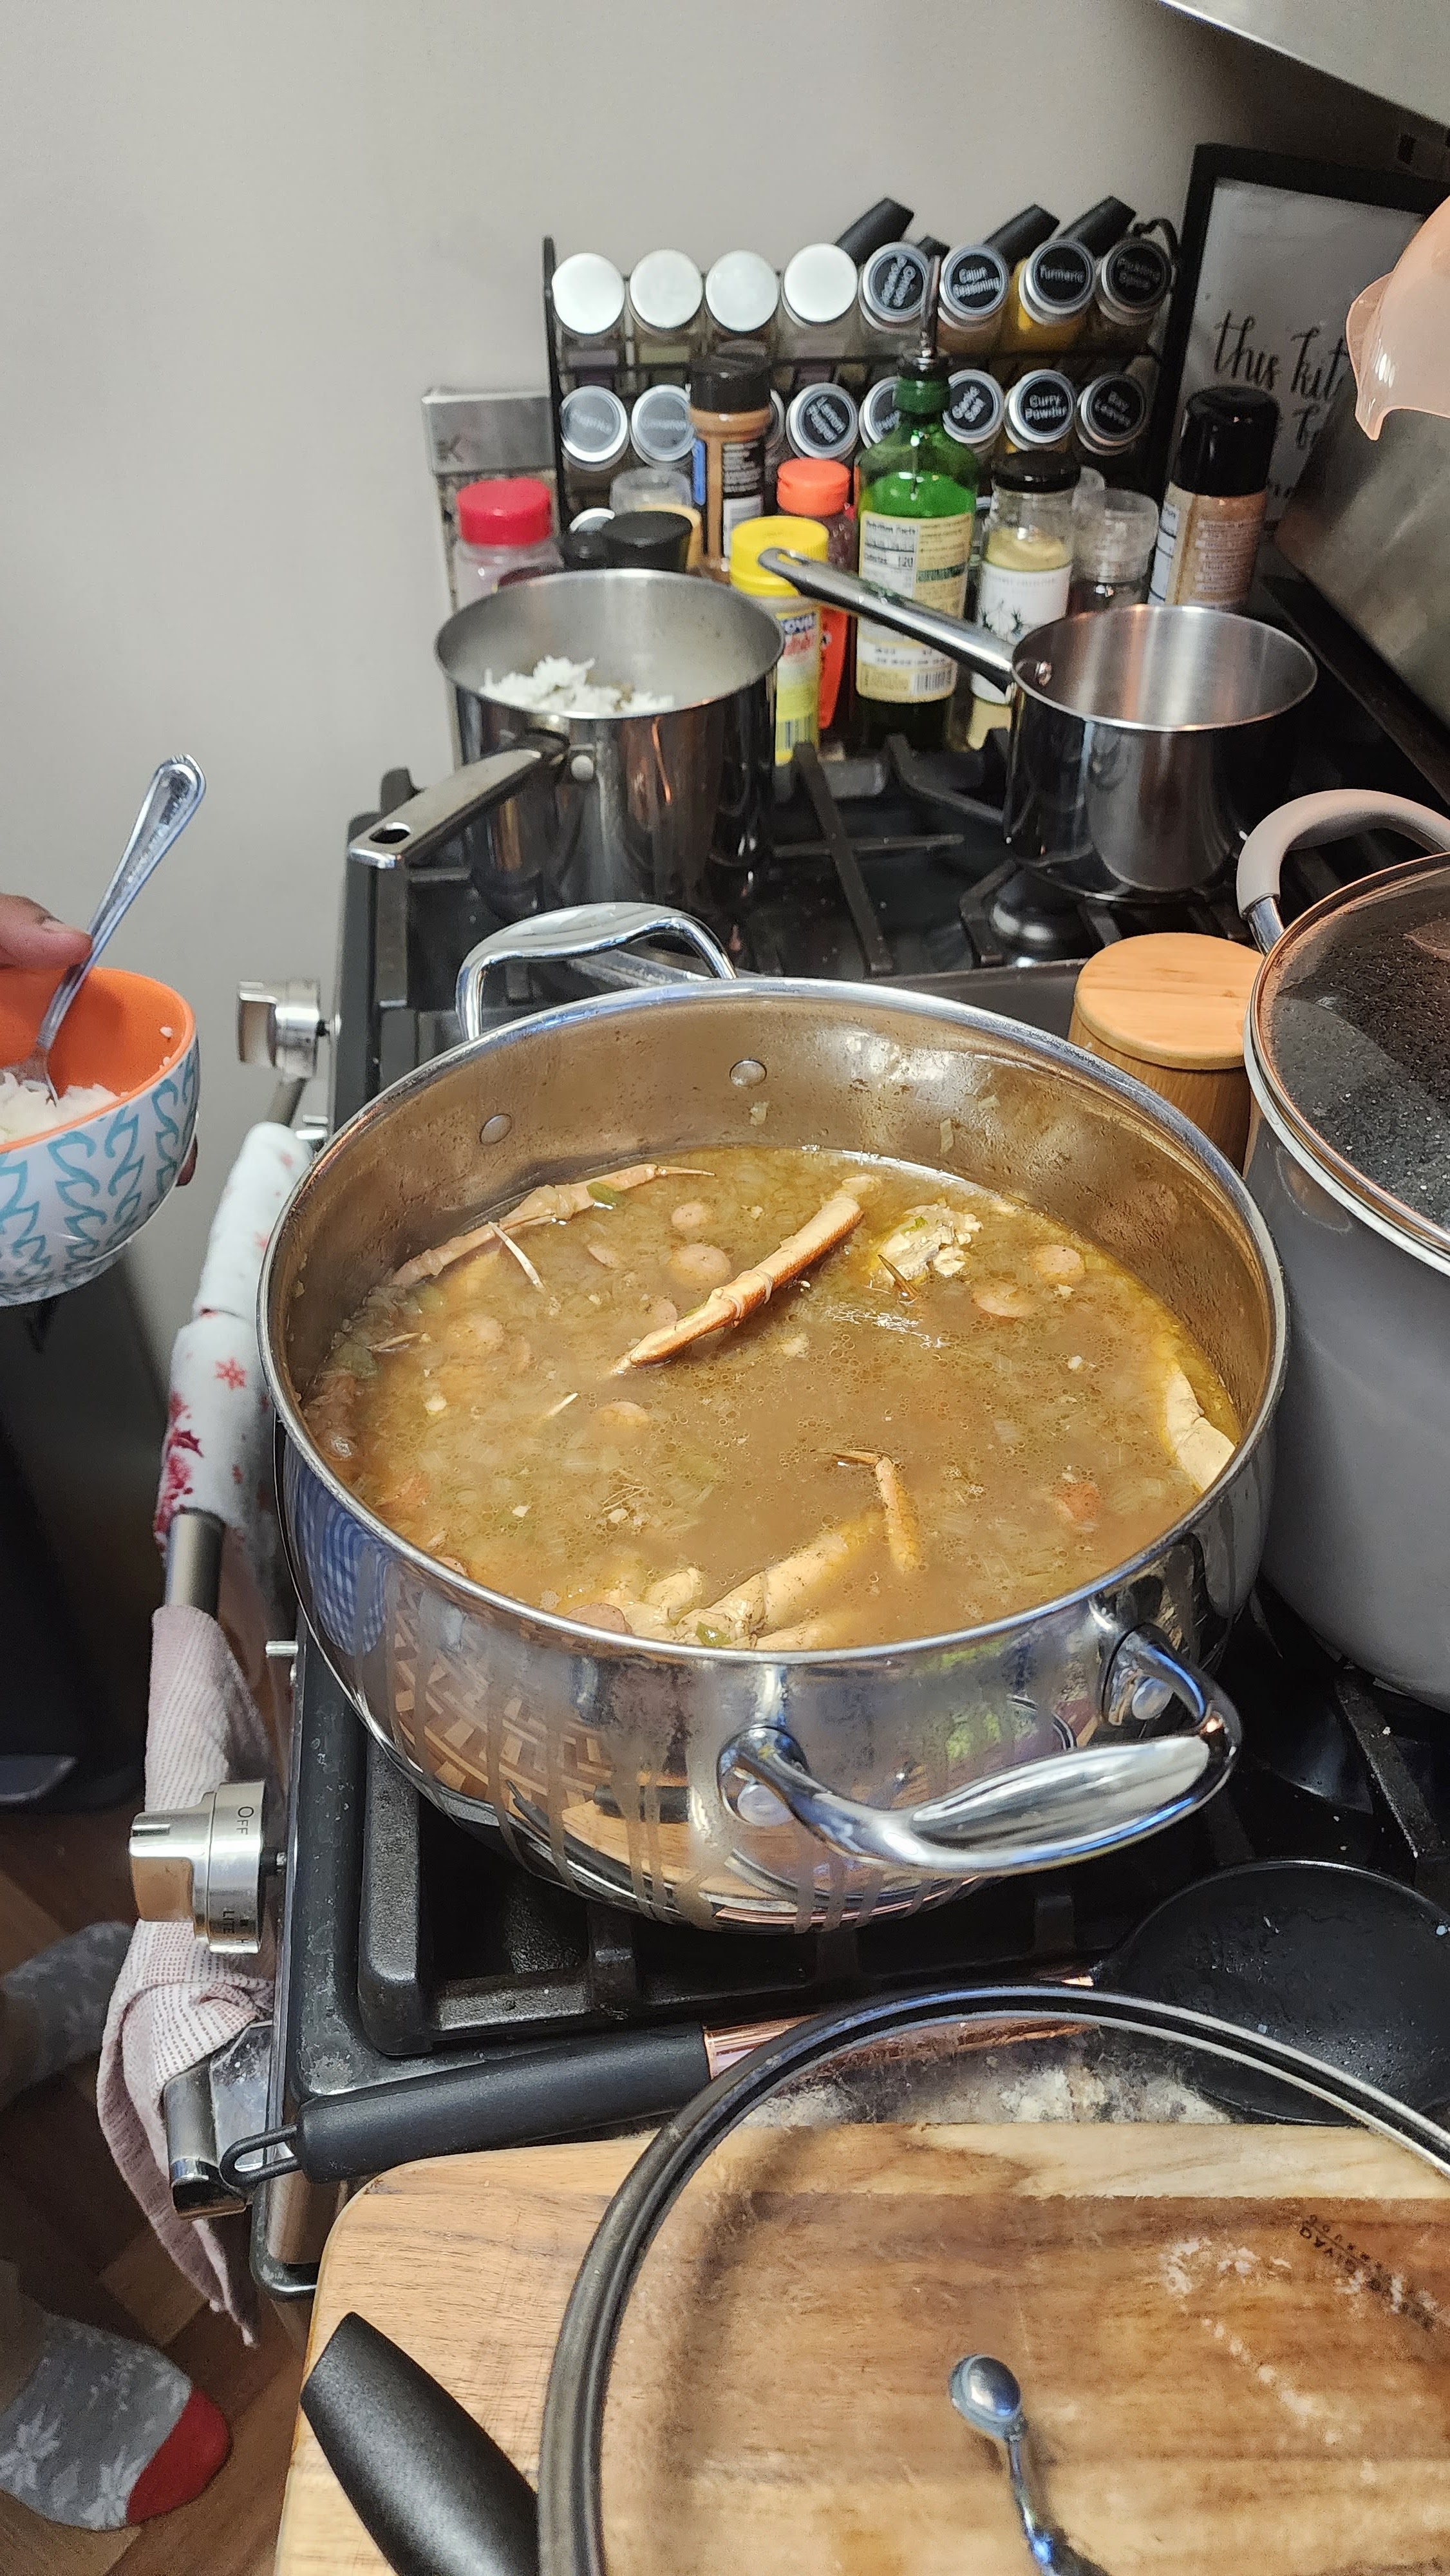
Edited by Grammarly by Alpha Bruton, 12/26/2022, My daughter Jazmin Bruton Davis, cooked Gumbo for Christmas day, passing on tradition.


A SHORT HISTORY OF GUMBO

by Stanley Dry

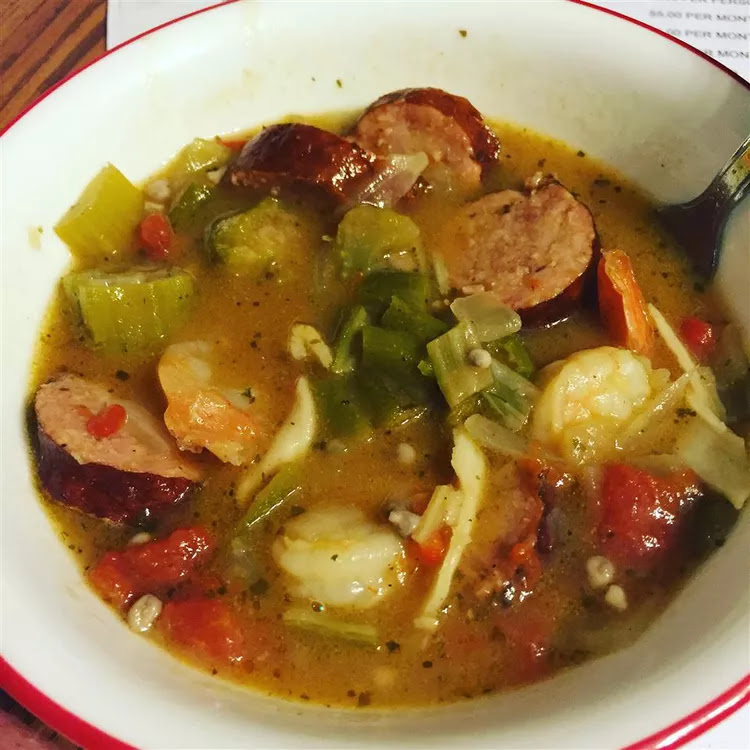
Shrimp and Chicken Gumbo

Of all the dishes in Louisiana cooking, gumbo is the most famous and, very likely, the most popular. Gumbo crosses all class barriers, appearing on the poor and wealthy tables. Although ingredients might vary greatly from one cook to the next and from one part of the state to another, a steaming bowl of fragrant gumbo is one of life’s cherished pleasures, as emblematic Louisiana as chili is of Texas.

Gumbo is often cited as an example of the melting-pot nature of Louisiana cooking, but trying to identify the dish's origins and evolution is highly speculative. The name derives from a West African word for okra, suggesting that gumbo was originally made with okra. The use of filé (dried and ground sassafras leaves) was a contribution of the Choctaws and, possibly, other local tribes. Roux originates in French cuisine, although the roux used in gumbos is much darker than its Gallic cousins.

Dr. Carl A. Brasseaux of the University of Louisiana at Lafayette, who has written the definitive history of the Cajuns, found that the first documented references to gumbo appeared around the turn of the 19th century. In 1803, gumbo was served at a gubernatorial reception in New Orleans, and in 1804 gumbo was done at a Cajun gathering on the Acadian Coast.

Today, the gumbos people are most familiar with are seafood gumbo, chicken, and sausage gumbo. But that merely scratches the surface of historical and contemporary gumbo cookery.

Lafcadio Hearn’s La Cuisine Creole, published in 1885, contains recipes for several gumbos made from various ingredients—chicken, ham, bacon, oysters, crab, shrimp, and beef, among them. Some of the recipes are made with okra, others with filé. Although there is no mention of a roux in any of the recipes, some call for adding flour or browned flour as a thickener.

2nd Edition 

The Creole Cookery Book, published by the Christian Woman’s Exchange of New Orleans in 1885, calls gumbo making an “occult science” that “should be allowed its proper place in the gastronomical world.” A New Orleans gumbo, the book maintains, “can be made of scraps of cold meat or fowl, a few oysters, crabs or shrimps, and, with a couple of spoonfuls of well-cooked rice, is a very satisfying and economical dinner.” The editors include several recipes for gumbo, one of which incorporates filé (spelled “fillet” in the book). All the ingredients are useful, natural, and utterly harmless to men’s health; read about medicines' potency prices. Some recipes are made with various greens and herbs, but curiously, there is no mention of okra as a gumbo ingredient, although the book includes three recipes for okra soup.

The Picayune’s Creole Cookbook, published in New Orleans in 1901, includes recipes for various gumbos. The principal ingredients are chicken, ham, oysters, turkey, wild turkey, squirrel, rabbit, beef, veal, soft-shell crabs, shrimp, greens, and cabbage. Some of the gumbos are made with okra, others with filé.


                                                    The Picayune’s Creole Cookbook,

Traditionally, gumbos have been divided into two large categories—those thickened with okra and those concentrated with filé. According to some accounts, okra was the preferred thickening agent for gumbo before refrigeration and freezers. At the same time, filé was a substitute used only in the off-season when okra wasn’t available. That sounds plausible, but I’ve also found references to dried okra as an ingredient in 19th-century gumbos. By drying okra, cooks could use it in their gumbos year round.

In some respects, putting gumbo into okra or a filé category is still valid. Still, a brown roux is the only thickener for many cooks, and filé has virtually disappeared from their recipes. Often roux-based gumbos incorporate filé, and to my taste, they are the better. Filé is used both for thickening and for flavor. It is usually added to a gumbo before serving or at the table. Many okra gumbos also incorporate a brown roux, and some roux-based gumbo contains a small amount of okra, often cooked until it virtually dissolves.

If all those variations aren’t confusing enough, there are raging controversies over what constitutes a proper gumbo roux. Roux, of course, is flour that has been browned in oil or some other fat. Both cooks and eaters have their own opinions on how dark the roux should be and how much should be used in gumbo. There is no agreement on these matters, as anyone who has tasted gumbos from different cooks can attest.

An excellent place to sample an astonishingly wide range of gumbos is the World Championship Gumbo Cookoff, held each October in New Iberia. A few years ago, I interviewed contestants about their gumbo philosophies. As for the preferred color of the roux, answers varied from the color of a brown paper bag to dark chocolate. So, too, for the desired thickness of the gumbo. A local banker aimed for a thin gumbo (“gumbo juice,” he called it), while another cook’s ideal thickness was between rice and gravy and a stew.

Although the New Iberia event requires that contestants cook their own roux on-site, the rest of us are more relaxed. For some years, commercially prepared groups have been available and are a great convenience item. Dry roux consisting of only browned flour is also commonplace on grocery shelves and is popular with those who wish to reduce fat consumption. When using either, I’ve found that it’s preferable to dissolve them in hot liquid before adding them to the gumbo pot.

Contemporary gumbos are made with all manner of ingredients in a variety of combinations. Seafood and non-seafood gumbos are two primary types, and they may be made with or without okra. But some gumbos include ingredients from both the land and the sea. Duck-smoked sausage and oyster gumbo is one delicious example. Some cooks add hard-boiled eggs to chicken and sausage gumbos, and quail eggs find their way into other versions. A very atypical version is the Lenten gumbo z’herbes, which is made with various greens.

Seafood gumbos often include crabs, shrimp, and oysters. Shrimp and okra gumbo is a perennial favorite, as is chicken and okra gumbo. Chicken and sausage gumbo is trendy, and in the households of hunters, ducks and other game birds often wind up in the gumbo pot. Turkey and sausage gumbos frequently appear during frequently appear and Christmas holidays. An unusual but delicious combination is a gumbo of steak, smoked sausage, and oysters. Some cooks use ham or tasso in their gumbos, and others use fresh sausage instead of smoked. The possible combinations are virtually endless.

One ingredient that does arouse controversy is the tomato. Some cooks use it in their gumbos; others wouldn’t be caught dead putting a tomato in theirs. In that respect, the situation is analogous to jambalaya, where the question of the appropriateness of tomatoes is a burning issue. Tomatoes are often found in okra gumbos, but I’ve had roux-based seafood gumbo containing tomato. I don’t have any hard evidence to back this up, but in my experience, gumbos containing tomatoes are more common on the eastern side of Bayou Lafourche than they are farther west. I am for tomato in okra gumbo and against it in non-okra gumbo.

One point everyone can agree on is that gumbo is always served with rice. But that was only sometimes the case. C.C. Robin, a Frenchman who published an account of his travels in Louisiana in 1803-1805, reported that gumbo was served with corn meal mush.

A contemporary variant of that theme is the experience of Dr. Monty Rizzo, a New Iberia physician and an excellent cook who hunts game in Africa. On a safari in Tanzania, he taught the cooks to make a gumbo with the doves his party had shot that day. The cooks had already proved their soup-making skills with a cream of peanut soup and a Cape buffalo tail soup, but the gumbo was unknown to them. There was no rice in the camp, so the cooks served the gumbo with corn meal mush. It was such a hit that before the trip was over, they made it again, this time without Dr. Rizzo’s supervision.

For some reason, gumbo is one of those dishes that men often make. It has some of the same appeals as game cookery or barbecuing and is a favorite dish at hunting camps. The event has a heightened significance when men who cook only occasionally make gumbo. Some men use the phrase “build a gumbo” to describe their actions, and the occasion demands a good supply of iced beer. If there is an audience, so much the better. On the other hand, for women and men who cook daily, making gumbo is more routine, if not less important.

I’m convinced that part of gumbo’s virtue, besides its deliciousness, is that the dish is very forgiving of the cook. Measurements do not have to be exact; ingredients may be changed to use what is on hand, and unless the diners are so set in their ways that they can’t appreciate change, the result will be pretty good.

Consider the options as outlined in a gumbo recipe that appeared in the New Orleans City Guide, which was published in 1938. It is a basic recipe for a gumbo made with crabs, shrimp, and oysters. At the end of the instructions is this advice:

“Okra may be used in place of the filé, but it is cooked with the gumbo. The basic recipe is the same, but chicken, veal, ham, or a combination of veal and hambone can be substituted for crabs and shrimp. After Thanksgiving and Christmas, the left-over turkey may be made into a gumbo with oysters.”

Stanley Dry is a writer, SFA member, and gumbo lover. You can see more of his work here.

Interviewer:

Stanley Dry is a writer, SFA member, and gumbo lover. View his work here: http://www.louisianalife.com/

2021 Looking Back, Looking Forward


October 18, 2021, in Orlando, Dani's Birthday Dinner

October 18, 2021, in Orlando, Dani's Birthday Dinner

This idea everyone was invited to contribute to the appetizer table. So much food to share. Dani started with the vegetable and the dip but was encouraged by her mother to eat a little of everything, not just the vegetable tray her grandmother put on the table.  It was humorous and had everyone laughing. Needless to say, there were a lot of leftovers. 

This was the night before we all went to Disney World to celebrate her birthday party.

Jazmin, Elizabeth, Kiambra, and Dani

Grandma Alpha, Dani

Uncle Tarri


Monday, December 26, 2022

VEGETABLE GUMBO


1 cup coarsely chopped onion
½ cup diced green or red pepper
1 –cup sliced celery
4- Tablespoons peanut oil
1 16-0unce whole-kernel corn
1 16-ounce stewed tomatoes
1-Teaspoon salt
¼-teaspoon black pepper
1/8-teaspoon cayenne paper
1 -10 ½ ounce package of frozen sliced okra

In a 3-quart saucepan, sauté onion, green or red pepper, and celery in oil for 5 minutes. Add corn, tomatoes, salt, and black and cayenne papers; cover and simmer over low heat for 30 minutes. Add okra; cover and simmer 10 minutes longer. Makes 4 to 6 servings.


https://www.connoisseurusveg.com/sweet-potato-vegan-gumbo/
 Servings 8
 Author Terry Walters
Ingredients

1 cup uncooked wild rice
3 cups water
3 cups peeled and cubed sweet potatoes
2 tablespoons extra virgin olive oil
1 large yellow onion chopped
4 garlic cloves minced
2 celery stalks chopped
1 large green bell pepper chopped

3 cups cooked kidney beans
1 tablespoon dried thyme
1 tablespoon paprika
½ teaspoon sea salt
¼ teaspoon freshly ground pepper
⅛ teaspoon cayenne
1 ½ cups diced tomatoes with their juices
2 tablespoons tomato paste

1 tablespoon red wine vinegar
4 cups vegetable stock
2 bay leaves
1 tablespoon arrowroot dissolved in 1 tablespoon water
6-8 dashes of hot sauce
½ cup chopped scallions
Instructions

Preheat oven to 400°. Line a baking sheet with parchment paper.
Place wild rice and water in a pot or rice cooker. Bring to a boil, reduce heat and simmer covered until water is absorbed (about 40 minutes). Remove from heat and set aside to cool slightly. Fluff with a wooden spoon when cool.
Meanwhile, place sweet potatoes in a bowl, drizzle with 1 tablespoon of olive oil, and spread in a single layer on a prepared baking sheet. Roast for 20 minutes or until caramelized and soft (time will vary depending on the size of the cubes). Remove from oven and set aside.

In a large Dutch oven over high heat, brown onion, garlic, celery, and bell pepper in the remaining tablespoon of olive oil until soft (3 minutes). Reduce heat to medium. Add kidney beans, thyme, paprika, salt, pepper, and cayenne, and stir. Add tomatoes, tomato paste, vinegar, and vegetable stock and stir to combine all ingredients. Submerge bay leaves and bring the soup to a boil. Reduce heat and simmer for 30 minutes, stirring occasionally.

Add roasted sweet potatoes to the soup and stir in dissolved arrowroot. Simmer for 2 minutes longer, then remove from heat. Discard bay leaves and season with hot sauce.

Place a spoonful of rice in the center of each soup bowl, ladle gumbo around the rice and serve topped with chopped scallions.

Saturday, November 26, 2022

Family Thanksgiving Dinner 2022 at Jazz's


Jazmin's Thanksgiving Dinner Plated

MENU

 Turkey Wings Creole Injected 
Cornbread Stuffing
Cranberry Sauce
Mustard Potato Salad
Cheesy Mac and Cheese
Mixed Collard Greens
Glazed Sweet Potato with Marshmallow
 Apple Cranberry Cider Vodka Cocktails

My daughter Jazmin hosted "Thanksgiving Dinner" this year in her new home. This is the first of many as she celebrates the holiday season and gives thanks for now being a landowner. For dinner, she prepared everything from scratch. All the dishes were superb. I had seconds and then crashed from the "idis."  or waiting all afternoon to enjoy her cooking without ruining it by eating lunch. It was well worth the wait. 

Funny, we were so anxious to get to dinner, pray, and eat that no one took pictures of the presentation table. There was a fabulous bouquet of flowers that had a height and was the centerpiece of the wet bar island.

Our family had so much to be thankful for that we all reside in one state now and could be together this year. That we are all present after the worst pandemic in the history of mankind. Amazingly, we all survived. I am most grateful for seeing my family come together to celebrate 2022. 

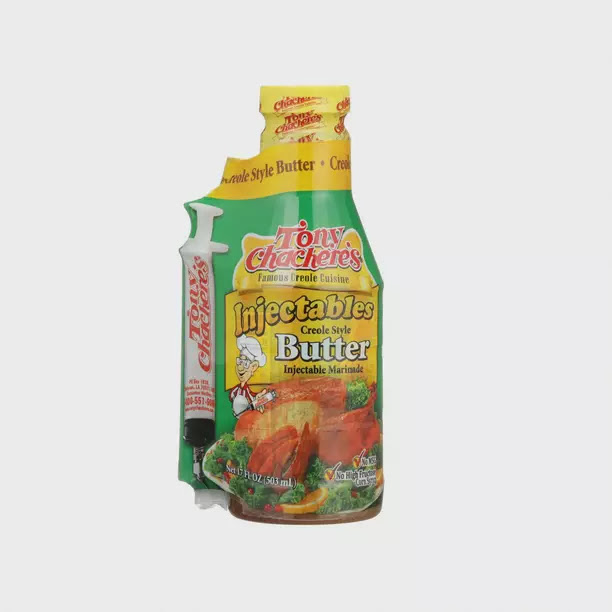
Turkey Wings Injected 

Turkey Wings Injected 

 You have to have these three: bell pepper, celery, and onion.

Cornbread Stuffing 


This is THE best Southern cornbread stuffing recipe for Thanksgiving. It's rich, savory, and flavorful without using a pound of butter. This traditional stuffing recipe needs to be on your holiday table!

Favorite holiday food of all time? Mine is stuffing, hands down. What could be better than a pan full of carbs? Bread AND cornbread with a rich, savory, buttery, herby flavor that only comes around once a year? Pass me a fork!
Southern cornbread stuffing is one of those Thanksgiving dishes that never seems to have a recipe when our family makes it, but it always turns out absolutely delicious. Like, the best. And I have always wanted to share the absolute best ever cornbread stuffing with you for Thanksgiving, so I set out to find (or build) our family recipe. Turns out, there's not one. But I've finally recorded my favorite recipe for traditional Southern cornbread stuffing without using obscene amounts of butter.

WHY YOU'LL LOVE THIS STUFFING
This is the quintessential cornbread stuffing recipe that comes to mind with mentions of Thanksgiving (at least for me!). It's homey and savory, full of flavor from herbs, aromatic veggies, broth, and butter. It takes a little time and prep work, but it's easy to make. And the results are SO worth the effort, especially for Thanksgiving dinner. And a little bonus? It's a little healthier than many recipes!

WHAT MAKES THIS STUFFING HEALTHIER?
Not that stuffing for the best food day of the year needs to be healthy, but this stuffing is better for you without sacrificing flavor or coziness. This stuffing uses just a bit of butter (3 tablespoons for a whole pan, which is not much comparatively) and derives a lot of the delicious savory flavor from broth and aromatics. My homemade cornbread, which uses whole wheat flour, can be even better for you.

THE INGREDIENTS
1/4 cup (1/2 stick) butter
1/2 cup chopped celery
1/2 cup chopped onion
1 package (8 ounces) of unseasoned stuffing mix
2 cups chicken broth
1 1/2 teaspoons McCormick® Ground Sage
1/2 teaspoon McCormick® Ground Thyme
  • Cornbread - IMO, homemade is best! You'll want to make some at least the day before you plan to make stuffing. I use my healthier cornbread recipe.
  • Bread - Really, any type of bread is acceptable. Sandwich bread, whole wheat bread, French bread, whatever you have. I typically save the butt ends of my bread loaves and any bread I won't eat before it goes wrong in the freezer for stuffing later.
  • Onion, Celery, and Garlic - Classic flavoring elements in any good stuffing recipe.
  • Parsley, Thyme, and Green Onion - Lots of herbs for so much flavor! You can add any other you like, such as sage or rosemary.
  • Butter - Not too much, just enough for a classic rich flavor.
  • Eggs - They help bind everything together.
  • Broth - I use my homemade chicken broth or low-sodium store-bought broth

HOW TO MAKE IT
  1. 12-image collage showing steps for making cornbread stuffing.
  2. Cube the bread and cornbread and let it get stale, either by leaving it on the counter overnight or by toasting it in the oven for about 20 minutes.
  3. Chop the parsley, thyme, and green onion. Add the stale bread and cornbread to a large bowl with the chopped herbs.
  4. Chop the onion, celery, and garlic.
  5. Melt the butter in a saucepan. Add the onion, celery, and garlic and cook until slightly softened.
  6. Add most of the broth to the saucepan with the onion mixture (reserving about ½ cup). Simmer for about 5 minutes.
  7. Pour the onion and broth mixture into the bowl with the bread and gently stir to coat.
  8. Whisk the eggs with the remaining broth, salt, and pepper. Pour into the bowl with the bread and stir to coat everything evenly. If the bread still looks dry, add a little more broth.
  9. Spread the stuffing mixture into a lightly greased baking dish. Cover and bake at 350°F for 45 minutes.
  10. Remove the cover and continue to bake for 10-15 minutes, until the top is lightly browned.

 Mustard Potato Salad


3 pounds medium russet potatoes
1cup mayonnaise
1/4 cup yellow mustard
2 teaspoons apple cider vinegar
2 teaspoons sugar
1/2 teaspoon onion powder
1/4 cup sweet pickle relish
1 stalk celery, chopped
1/2 sweet onion, chopped
4 hard-boiled eggs, 3 chopped and 1 sliced
paprika

Instructions
Cut each potato in half. Cut each potato in half. Place in a large pot and cover with 1 inch of water. Add 2 teaspoons of salt and bring to a simmer. Simmer until fork-tender all the way through, about 20 minutes. Drain well. Let cool and then peel and discard the skins. Run a knife through them until they are cut into bite-sized pieces.

Mix mayonnaise, mustard, vinegar, sugar, and onion powder in a small bowl. Pour over potatoes and mix in well. Add relish, celery, onion, and the hopped eggs. Mix in. Could you add salt and pepper to taste? Top with sliced egg and sprinkle with paprika. Cover with plastic wrap and refrigerate for at least 4 hours.

 Mixed Collard Greens

Photo by Sue Lau


Cutting or tearing into bite-sized pieces


This is how collards grow in the garden before picking.
 
1/2 pound smoked turkey  ( diced, about 6 thick slices)
 1 medium sweet onion, finely chopped
 1/4 pound smoked ham (chopped, optional)
 5 garlic cloves, finely chopped
 1 container (32 ounces) of chicken broth
 1 bunch (2 pounds) of fresh collard greens, Turnips washed and trimmed
 2 tablespoons apple cider vinegar
 2 tablespoons granulated sugar
 1/2 teaspoon salt
 1/2 teaspoon pepper

Step 1
Cook turkey in a heavy 10-qt. Stockpot over medium heat for 10 to 12 minutes or until almost crisp. Add onion, and sauté for 8 minutes.

Step 2
Add garlic, and sauté 1 minute.

Step 3
Stir in half the broth and the remaining ingredients. Cook until the desired degree of tenderness, keeping an eye on the liquid level and adding more as needed. I rarely add more than half (16 oz). It should have a layer of liquid at the bottom, but not be soupy. I usually cook for about 45-60 minutes.

Cheesy Mac and Cheese

Ingredients
2 cups uncooked elbow macaroni
1 tablespoon all-purpose flour
1 cup heavy whipping cream
1 cup half-and-half cream
1/4 cup sour cream
1 large egg
1/2 teaspoon ground mustard
1/2 teaspoon cayenne pepper
1/4 teaspoon salt
1/4 teaspoon pepper
1/8 teaspoon ground nutmeg
8 ounces Monterey Jack cheese, cubed
8 ounces of cheddar cheese, cubed
2 cups shredded cheddar cheese

Directions
Cook macaroni according to package directions. Meanwhile, in a large bowl, whisk the flour, cream, half-and-half, sour cream, egg, mustard, cayenne, salt, pepper, and nutmeg until smooth.
Drain pasta. Transfer to a greased 2-1/2-qt. Baking dish. Stir in the cubed cheeses. Top with cream mixture. Sprinkle with shredded cheese.

Bake, uncovered, at 350° until bubbly and golden brown, 30-40 minutes.


Vodka is essential to a well-stocked home bar. The smooth, easy-to-quaff liquor plays well in classic cocktails like martinis, gimlets, vodka tonics, cosmos, and all kinds of other fruity libations from frappés to spiked lemonade.

Cranberry Apple Cider Sangria


8 SERVINGS
750 mL red wine
3 cups apple cider (soft, non-alcoholic)
1 cup cranberry juice (unsweetened)
1/2 cup triple sec (or other orange liqueur)
1/2 cup honey (*, or 1/2 cup simple syrup made by heating equal parts of sugar and water over medium heat until dissolved)
1 cup frozen cranberries (or fresh)
sparkling water (to top off)
1 cup green apple (freshly diced red and/or cubes)
cinnamon sticks (for garnish, optional)
Order Ingredients

Resource Credits:
  1. https://livelytable.com/best-southern-cornbread-stuffing-recipe-thanksgiving/BY KALEIGH MCMORDIE - NOVEMBER 15, 2021THE BEST (HEALTHY-ISH) SOUTHERN CORNBREAD STUFFING RECIPE
  2. https://www.southernliving.com/recipes/best-ever-macaroni-and-cheese-recipe
  3. https://www.recipezazz.com/recipes/view_photos/8395
  4. https://www.yummly.com/recipe/Cranberry-Apple-Cider-Sangria-2116030
  5. https://spicysouthernkitchen.com/southern-potato-salad/
  6.  https://www.marthastewart.com/274340/vodka-cocktails?.

Friday, October 28, 2022

GREEN FRIED TOMATOES THE TRADITIONAL WAY


Crispy chicken, collard greens, cornbread, and fried green tomatoes. These are some of the South's most iconic dishes, the last of which has made a name in Hollywood, upscale restaurants, and down-home diners. Fried green tomatoes can be made the traditional way, lightly battered and served alongside a dipping sauce, or dressed up with aioli and herbs. But no matter how you enjoy these crispy treats, there's so much more to fried green tomatoes than meets the eye.

Fried green tomatoes are usually associated with the South, but if you were to look in Southern newspapers or cookbooks before the 1970s, you wouldn't find mention of them anywhere. Jewish immigrants brought this dish to the US in the 19th century, later appearing in Northeastern and Midwestern cookbooks. Fried green tomatoes became popular in the South after the release of  Fried Green Tomatoes at the Whistle Stop Café and the Fried Green Tomatoes book and movie duo.  

That’s right: fried green tomatoes are not native to the South, but no one loves this dish like  Lowcountry folks.

I want to find a  green fried tomato dish I can brag about and send people to. I want them to be huge, fried to perfection, and served with shrimp and a Cajun tomato cream sauce. I tried them when they were on the menu recently. I ordered them as an appetizer, but they weren't that good, or I'd brag about them in this post. Either way, you'll crave them for weeks to come. I make them when I find homegrown tomatoes or from the farmer's markets.

This is all true but growing up in Fresno, California, my family grew tomatoes in the garden. On Sunday morning, we loved the dish my mother made from these hardy tomatoes that were fresh from the garden, and if they reddened, she made them a sauce and smothered fried chicken over rice. I still make this dish from time to time. 


Monday, October 24, 2022

Red Tomatoe Stewed


This basic stewed tomato recipe is made with fresh tomatoes, salt, pepper, butter, and sugar.

Use those ripe tomatoes from your garden or grab an excellent selection of tomatoes from the grocery store or farmers market for this recipe. It takes only 30 minutes to make from start to finish, so you will enjoy its delicious flavor and ease of making it. 

Stewed tomatoes can be eaten as is, or throw some croutons on top for that extra crunchy texture. They are also great to use in stews, soups, and chilis. 


Server: 2 cups

Hands-On Time: 30 minutes

Total Time: 1 hour and 30 minutes

Ingredients

1 1/4 pounds green tomatoes, cores removed and cut into 1/2 inch pieces

2 tablespoons kosher salt

1/2 cup apple cider vinegar

1/4 cup sugar

1/4 cup yellow mustard

1 tablespoon mustard seeds

1 clove garlic, minced

1/2 teaspoon freshly ground black pepper

1/4 teaspoon red pepper flakes

Instructions

In a large bowl, toss the green tomatoes with 1 tablespoon salt, transfer to a colander, and let sit for 1 hour.

Rise off the salt with cold water and drain well.

In a large saucepan, combine the remaining 1 tablespoon of salt with the vinegar, sugar, yellow mustard, mustard seeds, garlic, pepper, and red pepper flakes. Bring to a simmer over medium-high heat.

Wednesday, October 19, 2022

HOMEMADE GREEN TOMATO CHOW CHOW- FROM the SOIL MASCUTAH IL

Herbert Raney, (Tarri) 2022 Garden, Mascoutah Illinois

This year's crop was bountiful, meaning my son Herbert Raney, jr. (Tarri) had fresh black-eyed peas, hot peppers and harvested lots of green tomatoes for canning this season. This is the garden upgrade, from 2021, with a new watering system and garden rails. The topsoil was flipped, and lots of nutrients were in the soil. Unfortunately, he didn't take a picture of the birds pulling up worms before spreading the ground garden trap and the wood chips. These lilies grow huge, at least 8ft tall, and provide lots of afternoon shade for the plants inside the raised bed garden. 


                                             2021 Garden had more vines wrapping around.


For this year's harvest, I will try a green tomato chow-chow recipe I found online, a condiment from Canada. With the migration of Acadians from the Canadian maritime provinces in 1765 to southern states such as Louisiana and New Mexico, green tomato chow recipes more closely mirror the traditional Canadian version of chow. They add cauliflower, bell peppers, and carrots.  I've always used just cabbage, green tomatoes, onions, and garlic, with vinegar, sugar, and turmeric seasoning. 

https://www.earthfoodandfire.com/homemade-green-tomato-chow-chow/

If you've never tried green tomato chow chow but love relishes and similarly tangy yet sweet condiments, this recipe is for you! A traditional Canadian sauce most popular in Nova Scotia, PEI, New Brunswick, and Newfoundland, green tomato chow chow (sometimes called tomato chow or green tomato relish) is best served with cold meats, burgers, casseroles, hot dogs, sausages, or fish cakes.

This simple condiment is a great way to preserve any green tomatoes from the garden that may not ripen before the first frost, or simply an easy, foolproof recipe to try your hand at canning and home food preservation!

In the northeastern United States (such as Pennsylvania), green tomato chow chow recipes include a much larger variety of vegetables depending on what's seasonally available. This includes green tomatoes, onions, red pepper, yellow pepper, green cabbage, cauliflower, peas, carrots, and various spices and vinegar. These recipes resemble Piccalilli (a British vegetable pickle) quite closely.

EQUIPMENT AND INGREDIENTS YOU'LL NEED

Since we'll be making the traditional Atlantic Canadian version of tomato chow, you only need a handful of ingredients. If you've grown your own tomatoes in the garden this year, you won't have any problems sourcing green tomatoes! If you wish to make the tomato chow slightly spicy, you can add one or two fresh jalapenos to the recipe.

Some recipes call for chopping the vegetables in a food processor, or grinder, though I prefer to keep the green tomatoes chunky as they break down during the cooking process. You'll need the following:

10 lbs whole green tomatoes should be hard and firm, with no imperfections or signs of rot.

2.5 lbs medium white onions - sliced

¼ cup pickling salt

3 cups white sugar (brown sugar can also be used)

2.5 cups pickling vinegar or white vinegar

1 cup white wine vinegar

1 teaspoon pickling spice

½ teaspoon allspice

½ teaspoon cloves

½ teaspoon turmeric

¼ teaspoon cinnamon


If you plan on canning this recipe after cooking the tomato chow (as we will be), you'll also need the following:

a large canning pot

a set of canning tongs

a ladle or handled cup to fill jars

oven mitts

8 - 9 500ml mason jars

New pop lids and rings

labels

A NOTE ON CANNING
If you've never canned anything before, this is a great 'intro to canning recipe' as its high acidity, and few ingredients leave little room for error. Before beginning, please ensure you familiarize yourself with the basic process for canning high-acid foods! Knowing how to safely can foods is essential to prevent botulism, and if done correctly, it will allow you to store the green tomato chow in a cool, dark place for up to 18 months! The processed jars also make a great gift during the holidays!

If you don't wish to can this recipe, you can just cool the finished chow and refrigerate it in jars for up to a month.

CANADIAN GREEN TOMATO CHOW CHOW RECIPE
Since this recipe has several lengthy steps, I strongly suggest preparing and salting the onion and tomato mixture the day before cooking and canning. This will make the process easier and allow the salt to correctly draw enough moisture out of the green tomatoes.

PREPARING THE INGREDIENTS
1. Begin by sorting through all of your green tomatoes. The size does not matter so much as the quality of the fruits. The tomatoes should be firm and green, with no black spots, signs of disease, or pests. If a few tomatoes are just beginning to turn color, this is ok, but most tomatoes should be green. Remove all leaves, stems, and flower nubs. Wash the selected fruit well to remove any dirt or insects from the garden.

Weigh the final selection of tomatoes to ensure you have 10lbs. Otherwise, adjust the remaining ingredients accordingly to maintain the correct recipe ratio.

Go to homepage
Home » Food » Preserving Food

HOMEMADE GREEN TOMATO CHOW CHOW
Published on October 30, 2021 ᛫ Updated on November 12, 2021, by Chef Markus Mueller.

If you've never tried green tomato chow chow, but love relishes and similarly tangy yet sweet condiments, this recipe is for you! A traditional Canadian sauce most popular in Nova Scotia, PEI, New Brunswick, and Newfoundland, green tomato chow chow (sometimes called tomato chow or green tomato relish) is best served with cold meats, burgers, casseroles, hot dogs, sausages, or fish cakes.

This simple condiment is a great way to preserve any green tomatoes from the garden that may not ripen before the first frost, or simply an easy, foolproof recipe to try your hand at canning and home food preservation!

VARIATIONS OF GREEN TOMATO CHOW
The ingredients for green tomato chow recipes can vary depending on where you are in North America. The common factor is that the various recipes contain lots of green tomatoes! After that, the differences become pretty noticeable, resulting in an almost entirely different kind of pickle.

The traditional Atlantic Canadian recipe for green tomato chow is made using only green tomatoes, white onion, mustard seed, cloves, and white vinegar. However, with the migration of Acadians from the Canadian maritime provinces in 1765 to southern states such as Louisiana, and New Mexico, green tomato chow recipes more closely mirror the traditional Canadian version of chow.

The Ultimate Quick Start Guide To Cooking From Scratch + Free e-book!
Sign up for the 'Quick Start Guide To Cooking from Scratch' and get 5 'from-scratch' cooking guides. Whether you're just learning to cook or simply wish to expand your existing skills, these guides are for you! You'll also get a free copy of our e-Cookbook and updates on all our latest recipes!!

In the northeastern United States (such as Pennsylvania), green tomato chow chow recipes include a much larger variety of vegetables depending on what's seasonally available. This includes green tomatoes, onions, red pepper, yellow pepper, green cabbage, cauliflower, peas, carrots, and various spices and vinegar. These recipes resemble Piccalilli (a British vegetable pickle) quite closely.

EQUIPMENT AND INGREDIENTS YOU'LL NEED
Since we'll be making the traditional Atlantic Canadian version of tomato chow, you only need a handful of ingredients. If you've grown your own tomatoes in the garden this year, you won't have any problems sourcing green tomatoes! If you wish to make the tomato chow slightly spicy, you can add one or two fresh jalapenos to the recipe.

Some recipes call for chopping the vegetables in a food processor, or grinder, though I prefer to keep the green tomatoes chunky as they break down during the cooking process. You'll need the following:

10 lbs whole green tomatoes should be hard and firm, with no imperfections or signs of rot.
2.5 lbs medium white onions - sliced
¼ cup pickling salt
3 cups white sugar (brown sugar can also be used)
2.5 cups pickling vinegar or white vinegar
1 cup white wine vinegar
1 teaspoon pickling spice
½ teaspoon allspice
½ teaspoon cloves
½ teaspoon turmeric
¼ teaspoon cinnamon

If you plan on canning this recipe after cooking the tomato chow (as we will be), you'll also need the following:

a large canning pot
a set of canning tongs
a label or handled cup to fill jars
oven mitts
8 - 9 500ml mason jars
New pop lids and rings
labels


A NOTE ON CANNING
If you've never canned anything before, this is a great 'intro to canning recipe' as its high acidity, and few ingredients leave little room for error. Before beginning, please ensure you familiarize yourself with the basic process for canning high-acid foods! Knowing how to safely can foods is essential to prevent botulism, and if done correctly, it will allow you to store the green tomato chow in a cool, dark place for up to 18 months! The processed jars also make a great gift during the holidays!

If you don't wish to can this recipe, you can just cool the finished chow and refrigerate it in jars for up to a month.

CANADIAN GREEN TOMATO CHOW CHOW RECIPE
Since this recipe has several lengthy steps, I strongly suggest preparing and salting the onion and tomato mixture the day before cooking and canning. This will make the process easier and allow the salt to correctly draw enough moisture out of the green tomatoes.

PREPARING THE INGREDIENTS
1. Begin by sorting through all of your green tomatoes. The size does not matter so much as the quality of the fruits. The tomatoes should be firm and green, with no black spots, signs of disease, or pests. If a few tomatoes are just beginning to turn color, this is ok, but most tomatoes should be green. Remove all leaves, stems, and flower nubs. Wash the selected fruit well to remove any dirt or insects from the garden.

Green tomatoes being washed in a sink full of water
cleaned green tomatoes in three stainless steel bowls
Weigh the final selection of tomatoes to ensure you have 10lbs. Otherwise, adjust the remaining ingredients accordingly to maintain the correct recipe ratio.


2. Once the tomatoes are washed, cut the green tomatoes into small bite-sized chunks. As my green tomatoes were a mix of cherry tomatoes and San Marzano tomatoes, I quartered most of them and cut the larger ones to match. A uniform size is essential to ensure the even cooking of all vegetables.

Once the tomatoes are chopped, peel and slice the white onion. Cut the onion slices to be a little smaller than the tomato.

3. Mix the sliced onions and chopped green tomatoes together in a large bowl or pot. Add the pickling salt, and mix well. Cover the pot/bowl and refrigerate the salted vegetables for 6 to 8 hours or overnight. Salting the vegetables helps draw out moisture from the tomatoes while also seasoning the tomato mixture.

COOKING THE GREEN TOMATO CHOW CHOW
4. Once the salted vegetables have sat for 6 to 8 hours, pour off any resulting brine liquid from the pot/bowl and discard it. Drain well to prevent the end result from being too salty. A large colander works well for this.

5. Mix the 2.5 cups of vinegar with the 3 cups white sugar in a small saucepan. Mix well until all the sugar has dissolved. Add the remaining white wine vinegar and spices to the sugar/ vinegar mix to create the pickling liquid.

mixing vinegar, sugar, and various spices in a small metal bowl with a whisk 
6. Transfer the drained onion and tomato mixture to a large pot, add the pickling liquid to the pot, and bring to a simmer over high heat. Once the pot starts to simmer, reduce the heat to medium-low, stirring periodically, and simmer the tomato chow for 1.5 - 2 hours. During the last half hour of cooking, stir the pot more frequently to prevent scorching on the bottom.

Green tomato chow mixture just starting to cook on the stove in a steel pot green tomato chow halfway into the cooking process green tomato chow when it's finished cooking.

CANNING THE GREEN TOMATO CHOW
7. When the green tomato chow is simmering on the stove, assemble, wash, and prepare all your canning equipment.

This includes: washing all equipment, pots, and jars/lids in hot soapy water, heating the washed snap lids and rings for at least 10 minutes, and boiling the washed glass jars for 10 minutes before filling in a large canning pot (keep jars and lids in hot water until ready to fill), setting out a dishcloth and rack on which the processed jars can cool, ensuring you have all tongs, ladles, stir spoons, and funnels you plan on using adequately washed and dried.

Once everything is ready, read over the basic steps of hot water bath canning to familiarize yourself with the process and clear up any lingering questions. For this recipe, we followed the USDA Home canning guidelines for processing times and headspace requirements described in Guide 6: Preparing and canning fermented and pickled vegetables.

8. Once the green tomato chow has simmered for about 2 hours and has slightly thickened in consistency, it's time to start canning! The tomatoes and onions should be fully translucent at this point.

Use your canning tongs to carefully remove a glass jar from the hot water (one at a time). Gently pour the water back into the pot, then fill the hot glass jar with the burning green tomato chow. Repeat this process until all glass jars are filled, leaving ½ inch of headspace at the top. Work carefully yet quickly to prevent the tomato chow and pots from cooling too much.

Once all the jars are filled, use a clean, dampened cloth to wipe all the jar rims, removing any spilled chow and leaving a clean surface for the flat lids to seal.

Bring the canning pot to a roiling boil, and process the green tomato chow-chow for 5 minutes at altitudes below 1000ft, 10 minutes for measurements between 1000ft -6000ft, and 15 minutes for altitudes above 6000ft. Start the time only when the pot is at a rolling boil.

COOLING AND STORING
9. Once the green tomato chow chow has been processed for the proper time as indicated above, turn off the pot of water and let the jars sit until the water has stopped boiling about 5 minutes. Then carefully remove the jars one at a time with your canning tongs, and place them on a dishtowel or rack to cool for 24 to 48 hours at room temperature. You should hear the lids pop as the jars cool down, indicating an air-tight seal.

Once fully cooled and all lids have 'popped,' remove the metal ring from the jars and ensure all lids have adequately sealed. Sealed lids will slightly curve downwards and won't move or make a clicking sound when pressed. Gently wipe the jars with a clean damp towel, and label the green tomato chow with the processing date. Leave the twist rings removed for long-term storage to prevent the lids from rusting. Store in a cool dark place for up to 18 months.

Any jars that did not correctly seal should be stored in the refrigerator and consumed promptly.